Firmware & Software
K-Line Firmware and Software
View  COLLAPSE
K4 High Performance Direct Sampling SDR Software
View
COLLAPSE
Current K4 Production Software
K4 Production Software (Release R38) June 17, 2026
- K4 software updates are handled at the radio itself. An ethernet connection is required to obtain new software. It is also possible to load (or re-load) software from a USB flash drive. For further information on that topic, please refer to the K4 Operating Manual.
- The K4 provides new features via software. As a result, you should consider the Release Notes as an extension of the Owners Manual. Documentation for the new features will be found there and will not appear in the Owner’s Manual until the next manual revision is released.
- K4 production software release notes appear below, followed by release notes for the present beta release.
===============================================================
====================== R38 (PRODUCTION) ===========================
===============================================================
June 17, 2026
This release is functionally identical to R38.BETA4, which has been tested and promoted to production status. See below for details.
FSK RTTY BUG NOTE: At present, FSK RTTY transmissions from a K4/0 (or from a K4 used as a client) will not work unless TEXT DECODE is enabled. This will be addressed in a future release. (When operating a K4 standalone, FSK RTTY transmit will work with or without text decode enabled.)
============================================================
======================R36 (PRODUCTION) ========================
============================================================
December 9, 2024
Release R36 is now available, bringing full remote control capability to your K4 transceiver, as well as several improvements that apply to both normal and Remote use. This release also lays the groundwork for remote control of the K4 from our forthcoming K4/0 control unit and VK4 software, as well as third-party control applications.
=== FOR FIRST-TIME REMOTE USERS ===
If you're new to K4-to-K4 remote operation, please refer to the K4's built-in operating manual for a comprehensive introduction and step-by-step setup procedure for both client and server radios. (See REMOTE CONTROL section, accessible from the table of contents.)
======================================
NEW FEATURES (RELATIVE TO R35 RELEASE)
======================================
=== ITEMS THAT APPLY TO BOTH NORMAL AND REMOTE ===
- "RX AUDIO GAIN BOOST" MENU ENTRY: This menu entry allows users who prefer higher overall audio output to specify up to 6 dB of additional gain. NOTE: The default setting (0 dB) is generally recommended. Higher settings should be used only if the maximum AF GAIN setting is not adequate for the operator. (The max of 6 dB is intended to reduce the possibility of AF-stage clipping on strong signals.)
- AGC THRESHOLD can now be set to values 2 and 3. These lower thresholds may be useful for those who prefer more aggressive AGC on weaker signals, such as on quiet bands or with preamps OFF.
- DIVERSITY-ON BUG FIX: When diversity is turned on, preamp, attenuator, and RF gain settings are no longer copied from VFO A to VFO B. (Also applies on band change with diversity already ON.)
- FSK TRANSMIT BANDWIDTH NOW MUCH NARROWER: Now using controlled sigmoidal tone-shift method to greatly reduce FSK TX bandwidth.
=== CHANGES PERTAINING ONLY TO REMOTE ===
- REMOTE SETTINGS BUTTON ADDED TO LCD: There's a new button ("globe" icon) in the lower left-hand corner of the LCD, next to the "?" (INFO) button. Tap this to access the client or server settings screens. Refer to the REMOTE feature details below, and the REMOTE section of the manual, for details on client and server setup.
- REMOTE FRONT PANEL EMULATION (AKA "REMOTE"): The new Remote feature allows you to easily control a K4 transceiver anywhere in the world over the Internet. The K4 can act as either a client or server, and no additional hardware or interface devices are required beyond a router at each end. Additional client devices and software are in development, including our K4/0 remote front panel unit, VK4 Windows application, and a third-party iOS app. (Additional client software applications may be developed in the future, thanks to the K4's large host command set and streaming capability.)
- REMOTE FRONT PANEL EMULATION DOCUMENTATION: The latest K4 operating manual includes a comprehensive section on setting up Remote. Please read this section carefully if you plan to use your K4 as a Remote server or client. To get to the REMOTE section, start at the Table of Contents (under "III. Operation"), then click on REMOTE near the bottom of the list.
- "TX MONITOR LEVEL, REMOTE" MENU ENTRY: This menu entry sets Remote TX monitor audio level *only* for CW M1..M4 message play and FSK/PSK tones. It does not affect normal paddle-sent CW sidetone in Remote, which is regenerated locally at the client K4.
======================================
REMOTE KNOWN ISSUES
======================================
The following will be addressed in a future release:
- XVTR menu functions not yet implemented for Remote purposes.
- In Client mode, DVR TX monitor level during playback tracks the AF GAIN control instead of being set by the MON knob.
- If SUB is ON when a DVR message is played, monitor audio is only output to the LEFT audio channel instead of both audio channels.
- In Client mode, CW and FSK memory playback cannot be interrupted by tapping the REC switch.
December 9, 2024
- See K4 Software Release Notes for complete revision history.
K4 BETA Software Release Notes
======================================================
====================== R38.BETA1 =======================
======================================================
Feb. 24, 2026
------------
NEW FEATURES
------------
- FULL SUPPORT FOR K4/0 REMOTE CONTROL PANEL. Note: Completion of K4-to-K4/0 support also directly benefits all third-party K4-Remote software applications.
- MANUAL NOTCH NOW AVAILABLE IN ALL DATA MODES.
- NOISE REDUCTION (NR) NOW AVAILABLE IN ALL DATA MODES.
- REMOTE TX PARAMETERS DISPLAYED AT CLIENT: TX parameters for the server K4 are now displayed in the status area of a client K4 or K4/0.
- LOCAL/REMOTE BUTTON ON CLIENT ALL-PARAMS DISPLAY: To access this, tap the status area of the LCD, lower-left-hand corner. When Remote is selected, voltage/current/temperature values shown apply to the remote server.
---------
BUG FIXES
---------
- TX METERS & BAR GRAPH: These no longer get "stuck" or flicker excessively when using a paddle/key after XMIT/PTT asserted.
- Resolved remaining RIT/XIT display issue with GHz frequencies.
- Eliminated low output/high PA current drain on MARS frequencies around 8.6 and 18.3 MHz
- Eliminated DVR play delay when returning to RX mode.
- MONitor level no longer defaults to 5 when the K4 makes a Remote connection.
- Cleaned up T/R artifacts that primarily affected CW operation during Remote operation.
- TX Gain Cal via TUNE defaults to OFF.
- VFO Coarse Tuning menu entry fixed for Remote case. (Menu entry is client only. Do not update remote unless RSET is active.)
- Transmit condition (at server) correctly terminates on remote client disconnect.
- On transverter bands at GHz frequencies, RIT/XIT adjustment no longer causes large frequency steps.
- Remote: Default audio encode mode is now set when the last client disconnects from the server.
- Remote connection issues: (1) A K4 acting as a client no longer accepts connections on port 9204 / 9205. (2) As a side effect of #1, a K4 will no longer be able to connect to itself. (3) A K4 that has a connected client is not allowed to connect to another K4 (i.e., the RRT command will fail with "RRT!;").
--------------
FOR DEVELOPERS
--------------
- DARC; command now clears AF PLAY display timestamps. DARC; forces the DAP idle.
- PO command AI responses being send to clients not in AI mode.
- Added support for RROn; command. Controls remote dialog popups with globe icon.
- SP command sent to server updates client as well.
- SQ+/- now working correctly. SQ- doesn't wrap.
- EC command is forwarded to remote server.
- MO command correctly opens menu on local client.
- Added support for SQ-; SQ+; SQ/; commands.
- Added support for RG/; toggle on/off. Toggles between previous nonzero value and zero.
- Added RG-; RG+ incr/decr commands.
======================================================
====================== R37.BETA1 =======================
======================================================
January 16, 2025
This is an interim release with only two changes:
-Experimental support for K4 Remote applications on Apple devices.
-Remote panadapter bug fix: Very large signals no longer show a negative value on the spectrum display.
======================================================
====================== R36.BETA4 =======================
======================================================
November 26, 2024
---------------------
KNOWN ISSUES (REMOTE)
---------------------
The following issues will be addressed in a future release.
- In Client mode, DVR TX monitor level during playback is tracking the AF GAIN control instead of being controlled by the MON knob.
- If SUB is ON when a DVR message is played, monitor audio is only output to the LEFT audio channel instead of both audio channels.
- In Client mode, CW and FSK memory playback cannot be interrupted by tapping the REC switch.
(For additional details on Remote, see full details at R36.BETA3, below.)
----------
BUGS FIXES
----------
- SUB RX AUDIO DURING REMOTE TX: Sub-RX audio no longer incorrectly appears in the right audio channel during transmit via a remote K4.
- MAX CLIENTS now shows correct value after power-cycle with any value (i.e., 0 to 4). (Setting MAX CLIENTS to 0 effectively prevents Remote use of your K4.)
- PTT/VOX ASSERTION WITH REMOTE DVR MESSAGE PLAY: With a Remote connection, PTT and VOX both now behave the same as they do in Local mode: You can have PTT or VOX asserted, then play a DVR message, and when it finishes, the server radio will still be in TX Mode (if PTT or VOX is still asserted). Previously, playing a message in this situation would result in the server radio exiting transmit.
- DVR RECORD CONTINUITY: Previously, DVR record could get canceled unexpectedly, sometimes making it difficult to record a new DVR message while connected to a remote server K4.
- DVR MESSAGE TX EQ: DVR messages are now correctly stored with *non-equalized* (FLAT) audio. TX EQ is applied only on playback.
--------------
FOR DEVELOPERS
--------------
- RX; command now correct terminates DVR message playback in all cases.
- RA-; command now works correctly in all cases.Nov. 26, 2024
---------------------
KNOWN ISSUES (REMOTE)
---------------------
The following issues will be addressed in a future release.
- In Client mode, DVR TX monitor level during playback is tracking the AF GAIN control instead of being controlled by the MON knob.
- If SUB is ON when a DVR message is played, monitor audio is only output to the LEFT audio channel instead of both audio channels.
- In Client mode, CW and FSK memory playback cannot be interrupted by tapping the REC switch.
(For additional details on Remote, see full details at R36.BETA3, below.)
----------
BUGS FIXES
----------
- SUB RX AUDIO DURING REMOTE TX: Sub-RX audio no longer incorrectly appears in the right audio channel during transmit via a remote K4.
- MAX CLIENTS now shows correct value after power-cycle with any value (i.e., 0 to 4). (Setting MAX CLIENTS to 0 effectively prevents Remote use of your K4.)
- PTT/VOX ASSERTION WITH REMOTE DVR MESSAGE PLAY: With a Remote connection, PTT and VOX both now behave the same as they do in Local mode: You can have PTT or VOX asserted, then play a DVR message, and when it finishes, the server radio will still be in TX Mode (if PTT or VOX is still asserted). Previously, playing a message in this situation would result in the server radio exiting transmit.
- DVR RECORD CONTINUITY: Previously, DVR record could get canceled unexpectedly, sometimes making it difficult to record a new DVR message while connected to a remote server K4.
- DVR MESSAGE TX EQ: DVR messages are now correctly stored with *non-equalized* (FLAT) audio. TX EQ is applied only on playback.
--------------
FOR DEVELOPERS
--------------
- RX; command now correct terminates DVR message playback in all cases.
- RA-; command now works correctly in all cases.
======================================================
====================== R36.BETA3 =====================
======================================================
Sept. 30, 2024
=== SUMMARY ===
Over the course of several field-test versions since R36.BETA2, we've used the experience gained to greatly improve client-side radio behavior in all modes. See full list of changes below. The K4 now has a convenient, reliable, and integrated solution for remote control, allowing you and you remote partners to share excellent RF locations and antenna systems.
This release also lays the groundwork for remote control of the K4 from our forthcoming K4/0 control unit and VK4 software. Full details will be posted when available.
=== FOR FIRST-TIME REMOTE USERS ===
If you're new to K4-to-K4 remote operation, please refer to the K4's built-in operating manual for a comprehensive introduction and step-by-step setup procedure for both client and server radios. (See REMOTE CONTROL section, accessible from the table of contents.)
=== FOR SOFTWARE DEVELOPERS ===
The K4 Programmer's Reference has recently been updated to cover all new and updated commands related to remote operation. Look for revision D2 (or later) of this document on our K4 documentation page.
------------------------------
IMPROVEMENTS TO REMOTE OPERATION SINCE R36.BETA2
------------------------------
- DVR MESSAGE TRANSMIT FUNCTIONS NOW AVAILABLE with remote connection.
- MAJOR REVISIONS TO RX/TX SEQUENCING IN K4 REMOTE: Eliminated audio artifacts, cleaned up timing, and improved QSK. (Note: Internet latency changes the sound of QSK, but it's still effective.) CW message repeat can now be interrupted in the delay between message transmissions.
- REDUCED RX AUDIO LATENCY; IMPROVED AUDIO QUALITY AND DROP-OUT RECOVERY. Increased data flow max timeout to 10 seconds. Taken together these changes will help smooth remote operation over erratic internet connections.
- EXTERNAL FSK KEYING OF CLIENT NOW WORKS: PTT action is passed to the server. Also, the FSK decode pin is now always enabled in FSK D mode.
- ANTENNA NAME DISPLAY AND ENABLED ANTENNA CONFIG is now working in remote.
- CORRECT ANTENNA NAMES USED IN REMOTE: If a server K4 had no named antennas, but the client did, client would see its own names in Remote mode. Now, the client will see only generic antenna names (e.g. ANT1/2/3) when connected to a server without named antennas.
- RX DYN. OPTIMIZATON menu entry now working in remote.
- MOUSE L/R BUTTON QSY MENU ENTRY now working in remote.
-----------------------
FOR SOFTWARE DEVELOPERS
-----------------------
The following control commands have been added or improved since R36.BETA2. See Programmer's Reference rev. D2 or later for full command descriptions.
=== NON-REMOTE ===
- Added RA+ RA- RA/ commands (attenuator control).
- XVTR support for FA set command added. (Previously, FA144200000; would go to 54 MHz.)
- APF audio peak setting was getting lost.
- DAMSm; saves last recording to Voice Memory m (see full DA command description).
- ACM, ACS, ACT; Specifies accessible antenna options in MAIN/SUB/TX ANT CFG (for use with RX ANT, SUB ANT, and ANT switches, respectively). Default antenna names can be recovered using ACN1~; or ACNn ; where n can be 1 to 5.
=== REMOTE ===
- DO; command (DIGOUT1 pin control) support added.
- IF; command response now returns correct state when connected to a remote.
- MI; command no longer changes mic input when in DATA mode; always forces MI2.
- RRC1; - sets connection limit to 1
- RL; - Returns currently selected software release (see RLP; RLF; etc.)
=== NEW BUFFER / LATENCY SETTING COMMANDS ===
In a high latency scenario (slow or unstable connection) you will need to adjust some buffer/latency settings to account for the random large jitter for a better overall quality experience.
On the CLIENT radio, you can adjust the desired RX audio buffer size: SL6; is the max (~686ms).
On the SERVER radio, there are two settings, one for TX audio, one for CW: SL6; as above for Phone. Then for CW, KZLnnn; where n is 1 to 999 ms. Example: KZL750; for 750 ms.
----------------------
K4 REMOTE KNOWN ISSUES
----------------------
- LOGGING CONSIDERATIONS FOR REMOTE CONTACTS: Be careful logging contacts when switching between local and remote. Your radio has the same LAN IP address and COM port numbers whether operating locally or connected to a remote server. Your logger can't tell the difference but your logs need to document the actual locations of the active radio.
- Frequency memories: The current implementation saves quick memory (and GP memory) data on the client radio for each individual server to which you connect, based on the target radio's serial number. It creates a different freqMemory in a sub-directory for each remote K4 to which you connect. So, if you connect to a server first, then reprogram all the per-band quick memories, they will be stored and usable on the client whenever connected.
- TX / MAIN RX / SUB RX functions: During Remote operation, most functions apply to the SERVER radio. In the future an asterisk (*) will be added to all functions that apply to the server.
- XVTR menu functions not yet implemented over remote.
K4/0 Remote Firmware and Utility
View
COLLAPSE
Current K4/0 Remote Production Software
K4/0 Remote Software (Release R3) June 17, 2026
===============================================================
====================== R3 (PRODUCTION) =======================
===============================================================
June 17, 2026
This release is functionally identical to R3.BETA2, which has been tested and promoted to production status. See below for details.
FSK RTTY BUG NOTE: At present, FSK RTTY transmissions from a K4/0 (or from a K4 used as a client) will not work unless TEXT DECODE is enabled. This will be addressed in a future release. (When operating a K4 standalone, FSK RTTY transmit will work with or without text decode enabled.)
- See K4/0 Software Release Notes for complete revision history.
K3S High Performance Transceiver Firmware and Utility
View
COLLAPSE
Current K3, K3/0 Mini and K3s Production Firmware
K3 MCU 5.67 / DSP 2.88 / FPF 1.26, 1-22-2019
All K3s radios ordered today will have Product Firmware loaded as they come out of the box. Monitor the Elecraft Email Reflector where announcements are made when new releases become available.
Elecraft delivers new features in firmware. As a result, you should consider the Release Notes as an extension of the Owners Manual. Documentation for the new features will be found there and will not appear in the Owner’s Manual until the next major manual revision is released.
Current Production Firmware Release Notes
- 6 M GAIN REDUCTION (FOR USE WITH KPA3A): In some cases the KPA3A may have more gain than necessary on 6 meters. As a precaution, all radios using a KPA3A (instead of the older KPA3) should be configured to insert some attenuation. See instructions below. No hardware modifications are required.
1. Select the 6 meter band.
2. Connect a dummy load rated at 50 W (or higher) to the transceiver.
3. Set the PWR control to 50 watts.
4. Place the ATU in bypass mode.
5. Locate the CONFIG:TUN PWR menu entry. Set the value to NOR using VFO A.
6. Locate the CONFIG:TXGN HP menu entry.
7. Tap the '8' switch (NR) once to add "ATN6" to the parameter display on VFO A. (Tapping it a second time would return to the original non-attenuated setting.)
8. Exit the menu.
9. Hold TUNE to do automatic power calibration on 6 meters at the 50 W level. After a few seconds, tap XMIT to terminate the TUNE operation.
NOTE: If you have difficulty reaching full power on 6 meters after making this change, it could be because your PA module is actually a KPA3, not a KPA3A. In this case, re-do the above procedure, changing the TXGN HP menu setting back to the original (i.e., without "ATN6" showing). (Max. power output at 50 MHz is specified at 100 W +/- 1 dB, typical. 1 dB below 100 W is approx. 90 W. See Specifications for max output at 51 MHz and higher.)
- T/R TIMING IMPROVED. Adds more margin during KPA3A TX sequencing.
- See K3 Firmware Release Notes for complete revision history
- Download the latest K3 Firmware.
Important - Please read before installing the latest Production Firmware
If you have firmware older than indicated below, please be sure to follow the steps below.
- MCU 5.10 (or later): Re-run the 50-Watt gain calibration step on all bands one time. Once this has been done, there is no need to do it again when loading releases above 5.10.
- MCU 4.67 (or later): Must be loaded with K3 Utility, Version 1.13.5.9 or later
Production Firmware Installation Instructions are found in the Utility
- All Production Firmware is loaded with the K3 Utility. It will take care of the download and installing Production Firmware
- Before loading Production Firmware, please ensure you have installed the latest version of the K3 Utility.
- See the Help → Getting Started pull-down menu in the K3 Utility for the steps to install firmware in your K3, K3/0 Mini, K3s.
Download and Install the K3 Utility for your Operating SystemFollow the links below to download and install the latest version of the Utility for your Operating System. You will be connecting the K3, K3/0 Mini, K3s to the computer with a USB A-to-B cable that was included with the K3, K3/0 Mini, K3s when it was shipped from the factory. Minimum Operating System Requirements for Elecraft Utilities: Microsoft Windows: XP Service Pack 3 or later, including Vista, 7, 8, and 8.1 and 10. Apple Mac: OS X 10.6 (Snow Leopard) or later
|
Beta Firmware Installation and Release Notes
Beta Firmware Release Notes
No Beta Firmware candidate at this time
Beta Test Firmware Installation Procedures
NOTE: Beta test firmware may have new issues that we haven't caught during field testing. Please report them to support@elecraft.com.
A little more detail
We make it a little harder to load Beta firmware mainly because we want you to be sure you want to do this. Beta firmware means that, while the K3, K3/0 Mini, K3s engineering team has fully tested the firmware, it has not yet been deemed ready for Production status. You can always return to the last firmware you have downloaded by following the steps in the K3 Utility’s Help section.
To load Beta Firmware, follow the steps below:
1. Create a new folder for the beta firmware on your Desktop or some other easily found location. Use the a different folder than the default folder found in the Firmware tab of the Utility. In this way, you can revert to the last Production firmware easily.
2. Now, we will download the firmware in Zip file format. In a web browser, type in this URL: https://ftp.elecraft.com/K3/firmware/beta
If you do not see the correct version of the zip file, press the RELOAD/REFRESH button on our browser to update your browser cache.
3. Right-click on the .zip file containing the beta firmware (e.g. k3fwXrYZ.zip for revision MCU X.YZ and all associated files). Save the file to your beta folder you just created.
4. Unzip the files into the beta folder.
5. Enter the path to the beta folder in K3 Utility → Firmware tab → "Local folder for firmware files".
6. After you have made the change in Step 5, make sure you *DO NOT* check the K3 Utility box titled "Copy new files from Elecraft server". This will overwrite the Beta firmware if clicked.
7. Connect the K3, K3/0 Mini, K3s to your computer and be sure it is turned on. Select the Firmware tab and Click on "Check versions now" button.
8. Review the release notes. To find them, select the "Help" pull-down menu.
9. Click "Send all firmware to K3." This will cause the firmware to be sent to the K3, K3/0 Mini, K3s. You will see that the K3, K3/0 Mini, K3s appears to restart itself. Monitor the Activity Log until it is complete.
10. After completing a new software download to your product, please power cycle the K3, K3/0 Mini, K3s OFF and then back ON before using it.
K144XV Firmware and Utility
View
COLLAPSE
Current K144XV Production Firmware Revision
Current Production K144XV Firmware Release Notes
- Fixes status LED lighting HF TX.
- See K144XV Firmware Release Notes for a complete revision history
- Download the latest K144XV Firmware
Please read before installing the latest Production Firmware
Production Firmware Installation Notes
- All Production Firmware is loaded with the K144XV Utility. It will take care of the download and installing Production Firmware
- Before loading Production Firmware, please ensure you have installed the latest version of the K144XV Utility.
- See the Help → Getting Started pull-down menu in the K144XV Utility for the steps to install firmware in your K144XV.
Download and Install the K144XV Utility for your Operating SystemFollow the links below to download and install the latest version of the Utility for your Operating System. Minimum Operating System Requirements for Elecraft Utilities Microsoft Windows: XP Service Pack 3 or later, including Vista, 7, 8, and 8.1 and 10. Apple Mac: OS X 10.6 (Snow Leopard) or later
|
Beta Firmware Installation
No Beta Release available at this time
Beta Test Firmware Installation Procedures
NOTE: Beta test firmware may have new issues that we haven't caught during field testing. Please report them to support@elecraft.com.
A little more detail
We make it a little harder to load Beta firmware mainly because we want you to be sure you want to do this. Beta firmware means that, while the K144XV engineering team has fully tested the firmware, it has not yet been deemed ready for Production status. You can always return to the last firmware you have downloaded by following the steps in the K144XV Utility’s Help section.
To load Beta Firmware, follow the steps below:
1. Create a new folder for the beta firmware on your Desktop or some other easily found location. Use the a different folder than the default folder found in the Firmware tab of the Utility. In this way, you can revert to the last Production firmware easily.
2. Now, we will download the firmware in Zip file format. In a web browser, type in this URL:
https://ftp.elecraft.com/K144XV/firmware/beta
3. Right-click on the .zip file containing the beta firmware (e.g. K144XVfwXrYZ.zip for revision MCU X.YZ and all associated files). Save the file to your beta folder you just created.
4. Unzip the files into the beta folder.
5. Enter the path to the beta folder in K144XV Utility → Firmware tab → "Local folder for firmware files".
6. After you have made the change in Step 5, make sure you *DO NOT* check the K144XV Utility box titled "Copy new files from Elecraft server". This will overwrite the Beta firmware if clicked.
7. Connect the K144XV to your computer and be sure it is turned on. Select the Firmware tab and Click on "Check versions now" button.
8. Review the release notes. To find them, select the "Help" pull-down menu.
9. Click "Send all firmware to K144XV" This will cause the firmware to be sent to the K144XV. You will see that the K144XV may appear to restart itself. Monitor the Activity Log until it is complete.
10. After completing a new software download to your product, please power cycle the K3/K3S OFF and then back ON before using it.
11. Please report any new firmware issues to support@elecraft.com
P3 High Performance Panadapter Firmware and Utility
View
COLLAPSE
Current Production Firmware :
All P3 panadapters ordered today will have Production Firmware loaded as they come out of the box. Monitor the Elecraft Email Reflector where announcements are made when new releases become available.
Elecraft delivers new features in firmware. As a result, you should consider the Release Notes as an extension of the Owners Manual. Documentation for the new features will be found there and will not appear in the Owner’s Manual until the next major manual revision is released.
Current Production P3 Firmware Release Notes
- P3 commands in keyboard macros: Added support to allow P3 commands to be embedded in SVGA keyboard macros. When entering a keyboard macro using a USB keyboard attached to the P3/SVGA, P3 commands can now be intermixed with K3 commands by preceding the with the ‘#’ character. Example: set up a macro to set the K3 to PSK31, frequency 14.070, P3 span of 100 kHz, fixed tune enabled: FA00014070000;MD6;DT3;#SPN001000;#FXT1;
- SVGA keyboard macros as function keys: The first 8 SVGA keyboard macros can now be executed from the 8 front panel function keys. First, using a keyboard, program the macro and make sure to save it into one of the first 8 locations (mem 1 – 8). Then on the P3, press the MENU button and using the encoder, select the SVGA menu and press the encoder to enter. Then using the encoder, choose “Macro 1” through “Macro 8”, then press the function key (short tap or long hold) to map the macro to the function key.
- Enable/disable TX sensing at the TxMon coupler: Added TxSensEn to TxMon sub-menu. This allows enabling/disabling of transmit sensing at the coupler. For K3 and K3S users, TxSensEn can be set to “disabled”, which will use the serial connection from the K3 to determine the TX state. Setting TxSensEn to “enabled” will use forward power sensed at the TxMon coupler to determine TX state (useful for non-Elecraft radios).
- K3S attenuator support: The P3 now properly scales the display when the four-step attenuator in the K3S is enabled.
- SWR meter blanked: Both the analog and digital SWR displays are now blanked whenever the transmit power is too low to give a valid reading.
- New #RCF command: “Relative Center Frequency” applies an offset to the center frequency based on the passed argument. Usage: #RCFsnnnnnn; Where: ‘s’ is the sign + or -, nnnnnn is the offset in Hz. For example, if the P3 is set to a 30 kHz span and you would like to position the cursor on the left edge: #RCF+015000; Using #RCF without any arguments returns the difference in Hz between the center frequency and the vfo frequency.
- Serial #DSM command: The Display Mode (#DSM) command now controls the Transmit Monitor's power/SWR meter display as well as enabling and disabling the waterfall window. #DSM0 = Spectrum display only, #DSM1 = Spectrum + waterfall, #DSM2 = Spectrum + meters, #DSM3 = Spectrum + waterfall + meters.
- New #FON command: The display font can now be selected via a serial command. #FON0 = 5 x 7 pixels, #FON1 = 7 x 11 pixels, #FON2 = 9 x 14 pixels.
- New #XCV command: The transceiver type can now be selected via a serial command. #XCV00 = "K3", #XCV01 = User-defined, #XCV03 = 455 kHz IF, etc. The command uses the same number order as in the "Xcvr Sel" menu item.
- Transceiver definition bug fix - Exiting: When exiting the "Xcvr Def" menu page, if the user-defined transceiver is already selected, it will reflect the new values immediately, rather than having to re-select it.
- Transceiver definition bug fix - IF Invert: The USER transceiver that is defined in the "Xcvr Def" menu item may now specify "Not inverted" IF tuning even if the "K3" control language is selected.
- SVGA resolution / main waterfall bug fix: The main waterfall height had been switching to the default value after changing SVGA resolution.
- VFO B cursor = VFO DATA A bug: The VFO B cursor had been matching the VFO A cursor in DATA A mode, even when VFO B was in a different mode.
- Bitmap Upload bug: Fixes a bug in which the waterfall area was omitted from a bitmap capture when the TXMON meters were visible.
- See P3 Firmware Release Notes for complete revision history
- Download the latest P3 Firmware.
Important - Please read before installing the latest Production Firmware
- This P3 firmware requires K3K3S firmware version 4.25 or later to operate.
- It must be loaded with P3 Utility version 1.15.8.28 or later
- P3 firmware Version 01.60 requires SVGA firmware 01.34 to support all SVGA features.
Production Firmware Installation Instructions are found in the Utility
- All Production Firmware is loaded with the P3 Utility. It will take care of the download and installing Production Firmware
- Before loading Production Firmware, please ensure you have installed the latest version of the P3 Utility.
- See the Help → Getting Started pull-down menu in the P3 Utility for the steps to install firmware in your P3.
| Download and Install the P3 Utility for your Operating System
Follow the links below to download and install the latest version of the Utility for your Operating System. Minimum Operating System Requirements for Elecraft Utilities Microsoft Windows: XP Service Pack 3 or later, including Vista, 7, 8, and 8.1 and 10. Apple Mac: OS X 10.6 (Snow Leopard) or later.
|
P3 Beta Firmware Installation and Release Notes
P3 Beta Firmware Release Notes
None right now!
Beta Test Firmware Installation Procedures
NOTE: Beta test firmware may have new issues that we haven't caught during field testing. Please report them to support@elecraft.com.
A little more detail
We make it a little harder to load Beta firmware mainly because we want you to be sure you want to do this. Beta firmware means that, while the P3 engineering team has fully tested the firmware, it has not yet been deemed ready for Production status. You can always return to the last firmware you have downloaded by following the steps in the P3 Utility’s Help section.
To Load Beta Firmware, follow the steps below:
1. Create a new folder for the beta firmware on your Desktop or some other easily found location. Use the a different folder than the default folder found in the Firmware tab of the Utility. In this way, you can revert to the last Production firmware easily.
2. Now, we will download the firmware in Zip file format. In a web browser, type in this URL:
https://ftp.elecraft.com/P3/firmware/beta/
If you do not see the correct version of the zip file, press the RELOAD / REFRESH button on your browser to update your browser cache.
3. Right-click on the .zip file containing the beta firmware (e.g. k3fwXrYZ.zip for revision MCU X.YZ and all associated files). Save the file to your beta folder you just created.
4. Unzip the files into the beta folder.
5. Enter the path to the beta folder in P3 Utility → Firmware tab → "Local folder for firmware files".
6. After you have made the change in Step 5, make sure you *DO NOT* check the P3 Utility box titled "Copy new files from Elecraft server". This will overwrite the Beta firmware if clicked.
7. Connect the P3 to your computer and be sure it is turned on. Select the Firmware tab and Click on "Check versions now" button.
8. Review the release notes. To find them, select the "Help" pull-down menu.
9. Click "Send all firmware to P3." This will cause the firmware to be sent to the K3S. You will see that the P3 appears to restart itself. Monitor the Activity Log until it is complete.
10. After completing a new software download to your product, please power cycle the P3 OFF and then back ON before using it.
11. Please report any new firmware issues to support@elecraft.com
KPA500 500 Watt Linear Amplifier Firmware and Utility
View
COLLAPSE
Current KPA500 Production Firmware
All KPA500 amplifiers ordered today will have Product Firmware loaded as they come out of the box. Monitor the Elecraft Email Reflector where announcements are made when new releases become available.
Elecraft delivers new features in firmware. As a result, you should consider the Release Notes as an extension of the Owners Manual. Documentation for the new features will be found there and will not appear in the Owner’s Manual until the next major manual revision is released.
Current Production Firmware Release Notes
- Added internal factory settings to optimize production of KPA500 product. No new operator features added to this release.
- Frequency count now requires at least 1/2 watt input power to be valid. This corrects rare issue with unexpected band change in SSB operation. All Faults may now be reset through serial port.
- Corrected issue with periodic switching from STBY to OPER when no band signals are connect, BCD or K3 RADIO mode is set, and PWR ON->OPER is set.
- See KPA500 Firmware Release Notes for a complete revision history
- Download the latest KPA500 Firmware.
Important - Please read before installing the latest Production Firmware
Production Firmware Installation Instructions are found in the Utility
- All Production Firmware is loaded with the KPA500 Utility. It will take care of the download and installing Production Firmware
- Before loading Production Firmware, please ensure you have installed the latest version of the KPA500 Utility.
- See the Help → Getting Started pull-down menu in the KPA500 Utility for the steps to install firmware in your KPA500.
Download and Install the KPA500 Utility for your Operating SystemFollow the links below to download and install the latest version of the Utility for your Operating System. Note: For KPAK3AUX cable use between the KPA500 and K3, K3 Firmware Version 4.36 or later must be loaded. Minimum Operating System Requirements for Elecraft UtilitiesMicrosoft Windows: XP Service Pack 3 or later, including Vista, 7, 8, and 8.1 and 10.Apple Mac: OS X 10.6 (Snow Leopard) or later |
| Windows | KPA Utility (Windows Version 1.13.7.16) July 16, 2013 |
| Macintosh | KPA Utility (64bit MAC OS X 64 bit Version 1.19.9.6) September 12, 2019 |
| X86 Linux |
KPA Utility (64bit Linux .tgz 64 bit Version 1.19.9.6) September 12, 2019
The following libraries and dependencies should be installed on your Linux distro: GTK+ 2.8 or later, glibc-2.4, libstdc++.so.6 and cURL. 64-bit Linux requires 32-bit compatibility libraries. |
| Installing the FTDI driver | Follow this link to the FTDI Site for drivers: http://www.ftdichip.com/Drivers/VCP.htm Depending on the Operating System you have, the driver needed for the Utility to communicate with the KPA500 will need to be loaded. All Elecraft products in production use the FTDI chipset for this function. The FTDI driver allows your computer to create a virtual COM port so that the Utility can communicate with the Elecraft product. For the KPA500, if your KUSB cable has a silver sheath on the wire, it is no longer supported. Elecraft recommends that a KUSB cable be purchased for full support. |
Beta Firmware Installation and Release Notes
Beta Firmware Release Notes
None right now!
Beta Test Firmware Installation Procedures
NOTE: Beta test firmware may have new issues that we haven't caught during field testing. Please report them to support@elecraft.com.
A little more detail
We make it a little harder to load Beta firmware mainly because we want you to be sure you want to do this. Beta firmware means that, while the KPA500 engineering team has fully tested the firmware, it has not yet been deemed ready for Production status. You can always return to the last firmware you have downloaded by following the steps in the KPA500 Utility’s Help section.
To load Beta Firmware, follow the steps below:
1. Create a new folder for the beta firmware on your Desktop or some other easily found location. Use the a different folder than the default folder found in the Firmware tab of the KPA500 Utility. In this way, you can revert to the last Production firmware easily.
2. Now, we will download the firmware in Zip file format. In a web browser, type in this URL: https://ftp.elecraft.com/KPA/firmware/beta
If you do not see the correct version of the zip file, press the RELOAD/REFRESH button on your browser to update your browser cache.
3. Right-click on the .zip file containing the beta firmware (e.g. KPA500fwXrYZ.zip for revision MCU X.YZ and all associated files). Save the file to your beta folder you just created.
4. Unzip the files into the beta folder.
5. Enter the path to the beta folder in KPA500 Utility → Firmware tab → "Local folder for firmware files".
6. After you have made the change in Step 5, make sure you *DO NOT* check the KPA500 Utility box titled "Copy new files from Elecraft server". This will overwrite the Beta firmware if clicked.
7. Connect the KPA500 to your computer and be sure it is turned on. Select the Firmware tab and Click on "Check versions now" button.
8. Review the release notes. To find them, select the "Help" pull-down menu.
9. Click "Send all firmware to KPA500." This will cause the firmware to be sent to the KPA500. You will see that the KPA500 appears to restart itself. Monitor the Activity Log until it is complete.
10. After completing a new software download to your product, please power cycle the KPA500 OFF and then back ON before using it.
11. Please report any new firmware issues to support@elecraft.com
KAT500 Fully Automatic Tuner Firmware and Utility
View
COLLAPSE
Current Production Firmware
MCU 02.16 5-29-24
All KAT500 tuners ordered today will have Production Firmware loaded as they come out of the box. Monitor the Elecraft Email Reflector where announcements are made when new releases become available.
Elecraft delivers new features in firmware. As a result, you should consider the Release Notes as an extension of the Owners Manual. Documentation for the new features will be found there and will not appear in the Owner’s Manual until the next major manual revision is released.
Current Production Firmware Release Notes
- 02.16 10-30-2023
Bugfix: Kenwood memory channel IF response handler. - 02.15 9-26-2023
Bugfix: Attenuator not deployed when it should have been during ATU tune. Aggravated exciter foldback. - 02.14 9-21-2023
Bugfix: Serial port speed changes using BR command were not being stored in EEPROM. - 02.13 9-12-2023
Add "ATU settings per bin" to limit the number of ATU settings that can be stored in any given "bin" (frequency segment) for a particular antenna.
Each "bin" has room for 6 ATU settings, shared by all three antenna connectors.
For example, If you're using all 3 antenna connectors for a particular band, you might limit the maximum number of ATU settings for each antenna to 2. If you're using 2 connectors on another band, you might set ATU settings per bin to 3.
See the updated KAT500 Automatic Antenna Tuner Serial Command Reference AB command for details. An updated KAT500 Utility may be used to configure ATU Settings per bin.
Illuminate BYP LED in modes AUTO and MAN when the current ATU setting is "bypassed".
DM command response trimmed, now shows the number of unused ATU settings on one line. Band, bin, and EEPROM address were removed. BYP relay shown only when bypassed. Added trailing ; CR LF.
In some low forward power high SWR scenarios when only the frequency counter is used to detect band change, the ATU was reluctant to change bands and full search tunes "stuttered".
Full search tune requires more than minimum power to compute an accurate SWR, 20 watts is suggested.
Use last-measured SWR bypass when capacitor or inductor is manually changed. - 02.10 6-27-2023
Add semicolon terminator to DM command response.
Reset amp key interrupt when fault is cleared if no longer transmitting.
Don't undo manual AMPI1; setter without power cycle. - 02.08 5-11-2022
Accept AKIP and SM commands with leading spaces and don't require leading zeros. - 02.07 1-7-2022
Some low power full search tunes were erroneously replaced with "bypassed". - See KAT500 Firmware Release Notes for complete revision history.
- Download the latest KAT500 Firmware.
Important - Please read before installing the latest Production Firmware
Production Firmware Installation Instructions are found in the Utility
- All Production Firmware is loaded with the KAT500 Utility. It will take care of the download and installing Production Firmware
- Before loading Production Firmware, please ensure you have installed the latest version of the KAT500 Utility.
- See the Help → Getting Started pull-down menu in the KAT500 Utility for the steps to install firmware in your KAT500.
Download and Install the KAT500 Utility for your Operating SystemFollow the links below to download and install the latest version of the Utility for your Operating System.
Minimum Operating System Requirements for Elecraft UtilitiesMicrosoft Windows: XP Service Pack 3 or later, including Vista, 7, 8, and 8.1 and 10. Follow this link to the FTDI Site for drivers for the KXUSB cable: http://www.ftdichip.com/Drivers/VCP.htmDepending on the Operating System you have, the driver needed for the Utility to communicate with the KAT500 will need to be loaded.All Elecraft products in production use the FTDI chipset for this function. The FTDI driver allows your computer to create a virtual COM port so that the Utility can communicate with the Elecraft product.
|
Beta Firmware Installation and Release Notes
Beta Firmware Release Notes
No Release at this time.
See KAT500 Software Release Notes for complete revision history.
Beta Test Firmware Installation Procedures
NOTE: Beta test firmware may have new issues that we haven't caught during field testing. Please report them to support@elecraft.com.
A Little more detail
We make it a little harder to load Beta firmware mainly because we want you to be sure you want to do this. Beta firmware means that, while the KAT500 engineering team has fully tested the firmware, it has not yet been deemed ready for Production status. You can always return to the last firmware you have downloaded by following the steps in the KAT500 Utility’s Help section.
To load Beta Firmware, follow the steps below:
1. Create a new folder for the beta firmware on your Desktop or some other easily found location. Use the a different folder than the default folder found in the Firmware tab of the Utility. In this way, you can revert to the last Production firmware easily.
2. Now, we will download the firmware in Zip file format. In a web browser, type in this URL: elecraft.com/KAT500/firmware/beta
If you do not see the correct version of the zip file, press the RELOAD/REFRESH button on your browser to update your browser cache.
3. Right-click on the .zip file containing the beta firmware (e.g. k3fwXrYZ.zip for revision MCU X.YZ and all associated files). Save the file to your beta folder you just created.
4. Unzip the files into the beta folder.
5. Enter the path to the beta folder in K3 Utility → Firmware tab → "Local folder for firmware files".
6. After you have made the change in Step 5, make sure you *DO NOT* check the KAT500 Utility box titled "Copy new files from Elecraft server". This will overwrite the Beta firmware if clicked.
7. Connect the KAT500 to your computer and be sure it is turned on. Select the Firmware tab and Click on "Check versions now" button.
8. Review the release notes. To find them, select the "Help" pull-down menu.
9. Click "Send all firmware to KAT500." This will cause the firmware to be sent to the KAT500. You will see that the KAT500 appears to restart itself. Monitor the Activity Log until it is complete.
10. After completing a new software download to your product, please power cycle the KAT500 OFF and then back ON before using it.
11. Please report any new firmware issues to support@elecraft.com
KPA1500 1500 Watt Linear Amplifier Firmware and Utility
View
COLLAPSE
Current KPA1500 Production Firmware
MCU 03.06 7/30/2025
All KPA1500 amplifiers ordered today will have Product Firmware loaded as they come out of the box. Monitor the Elecraft Email Reflector where announcements are made when new releases become available.
Elecraft delivers new features in firmware. As a result, you should consider the Release Notes as an extension of the Owners Manual. Documentation for the new features will be found there and will not appear in the Owner’s Manual until the next major manual revision is released.
Current Production Firmware Release Notes
03.06 7/30/2025
-
Bugfix: ^APxx; response for antennas 10 thru 32 corrected.
-
ATU status page shows frequency range of selected setting, e.g. 14020-14039.
-
See KPA1500 Firmware Release Notes for complete revision history
- Download the latest KPA1500 Firmware.
Important - Please read before installing the latest Production Firmware
Production Firmware Installation Instructions are found in the Utility
- All Production Firmware is loaded with the KPA1500 Utility. It will take care of the download and installing Production Firmware
- Before loading Production Firmware, please ensure you have installed the latest version of the KPA1500 Utility.
- See the Help → Getting Started pull-down menu in the KPA1500 Utility for the steps to install firmware in your KPA1500.
Download and Install the KPA1500 Utility for your Operating SystemFollow the links below to download and install the latest version of the Utility for your Operating System. You will be using the USB A-to-B cable that was shipped with the KPA1500.
Minimum Operating System Requirements for Elecraft UtilitiesMicrosoft Windows: XP Service Pack 3 or later, including Vista, 7, 8, and 8.1 and 10.
|
Beta Firmware Installation and Release Notes
Beta Firmware Release Notes
03.07 11/14/2025
- Add commands ^TX, ^RX, ^TQ to simulate pulling KEY IN down. See 3.07 update to
KPA1500 Programing Reference. - Pause ATU tuning if forward power exceeds 100W to avoid switching ATU relays with too much exciter power. Display LCD message if this occurs.
- LCD shows forward power if too low (< 5 W) or too high (> 100W) for ATU tuning to
progress. Exciter foldback is common during ATU tune. - Switch VFWD/VREV to high power range if forward power exceeds 200W.
03.03 6/11/2024
^EM command accepts lower case "ab" for all band ATU memory erase.
03.02 6/3/2024
- Set SWR bypass from most recently loaded ATU setting in recall tunes
- Fix HiSWR retune regression introduced in 2.64
- Add ^ON/; toggle. If power is on, ^ON/; turns power off. If power is off, ^ON/; turns power on.
03.01 10/26/2023
- Display LCD antenna change message only if any of ANT3 thru ANT32 are enabled on theCURRENT band.
- Extend transient LCD message display time from 1.5 to 2.5 seconds.
03.00 9/26/2023
- Save your existing version 2.xx configuration before installing this firmware, and restore that saved configuration should you revert to an earlier firmware version.
- The existing amplifier configuration is reset on first start after installing this firmware version. ATU settings are preserved. Use the KPA1500 Utility Configuration tab, Edit Configuration to review your configuration.
- Extend antenna numbering up to 32 antennas on each band. An external device may be used to inform KPA1500 of antenna changes by sending an ^AN command, or press the KPA1500 front panel ANTENNA button to advance through enabled antennas. ATU settings are stored and recalled by antenna number 1 through 32. Antennas 3 through 32 are routed through KPA1500 rear-panel "connector" ANT 1 or ANT 2. See ^AE (Antenna Enable) in the new KPA1500 V3 Programming Reference for details.
- The KPA1500 Utility configuration tab has not yet been extended to support these new antenna numbers; use the Utility command tester tab and KPA1500 V3 Programming Reference to enter new forms of ^AE (antenna enable), ^AM (ATU Mode), ^AN (change antenna), ^AP (preferred antenna), and ^EM (erase ATU settings).
- Extend ANTENNA PREFER and ATU MEM ERASE menu items; select the appropriate antenna by advancing through enabled antennas with the front panel ANTENNA button.
- A new LCD status page shows the currently selected antenna number, band, and antenna connector. If Antenna number 3-32 is selected, the ANT LEDs also show the antenna connector being used.
- Change the ANTENNA ENABLE menu item to ANT ENABL and show the antennas enabled on the current band (all those that fit within 16 characters).
- Each "bin" (frequency segment) now has room for 32 ATU settings. Use ^AB (ATU settings per bin) to limit the number of settings used for each antenna number. For example, if you have 8 enabled antenna numbers on a given band, it might be helpful to limit each antenna to use 2 or 4 ATU settings in each bin.
- Show antenna number in a transient LCD display on antenna changes, including connector number if antenna number 3 through 32 is selected. This display is not shown if antenna 3 through 32 are disabled on all bands; the ANT 1 and ANT 2 LEDs suffice.
- ^DF command response now shows number of unused ATU settings
- Resequence FAN SPEED DWELL menu item after FAN SPEED
Beta Test Firmware Installation Procedures
NOTE: Beta test firmware may have new issues that we haven't caught during field testing. Please report them to support@elecraft.com.
A little more detail
We make it a little harder to load Beta firmware mainly because we want you to be sure you want to do this. Beta firmware means that, while the KPA1500 engineering team has fully tested the firmware, it has not yet been deemed ready for Production status. You can always return to the last firmware you have downloaded by following the steps in the KPA1500 Utility’s Help section.
To load Beta Firmware, follow the steps below:
1. Create a new folder for the beta firmware on your Desktop or some other easily found location. Use the a different folder than the default folder found in the Firmware tab of the KPA1500 Utility. In this way, you can revert to the last Production firmware easily.
2. Now, we will download the firmware in Zip file format. In a web browser, type in this URL: https://ftp.elecraft.com/KPA1500/firmware/beta
If you do not see the correct version of the zip file, press the RELOAD/REFRESH button on your browser to update your browser cache.
3. Right-click on the .zip file containing the beta firmware (e.g. KPA1500fwXrYZ.zip for revision MCU X.YZ and all associated files). Save the file to your beta folder you just created.
4. Unzip the files into the beta folder.
5. Enter the path to the beta folder in KPA1500 Utility → Firmware tab → "Local folder for firmware files".
6. After you have made the change in Step 5, make sure you *DO NOT* check the KPA1500 Utility box titled "Copy new files from Elecraft server". This will overwrite the Beta firmware if clicked.
7. Connect the KPA1500 to your computer and be sure it is turned on. Select the Firmware tab and Click on "Check versions now" button.
8. Review the release notes. To find them, select the "Help" pull-down menu.
9. Click "Send all firmware to KPA1500." This will cause the firmware to be sent to the KPA1500. You will see that the KPA1500 appears to restart itself. Monitor the Activity Log until it is complete.
10. After completing a new software download to your product, please power cycle the KPA1500 OFF and then back ON before using it.
Please report any new firmware issues to support@elecraft.com.
K3/0 Mini Firmware and Utility
View
COLLAPSE
Current K3, K3/0 Mini and K3s Production Firmware
All versions of the K3 Transceivers use the same Production Firmware and Utility for the Operating System. Visit here to access your Firmware and Utility.
K-POD Remote Control Module Firmware and Utility
View
COLLAPSE
Current Production Firmware
MCU 1.12
All K-Pod radios ordered today will have Product Firmware loaded as they come out of the box. Monitor the Elecraft Email Reflector where announcements are made when new releases become available.
Elecraft delivers new features in firmware. As a result, you should consider the Release Notes as an extension of the Owners Manual. Documentation for the new features will be found there and will not appear in the Owner’s Manual until the next major manual revision is released.
Current Production Firmware Release Notes
- 1.12 10/20/2021
Holding down F4 on power up selects encoder 1:1 rate.
Holding down F5 on power up selects 1:0.5 rate.
Encoder rates can now be configured via USB (for K4 use). - 1.11 06/29/2020
Adds hold of F4 key on power-up selects 800 counts per revolution. - See K-Pod Firmware Release Notes for complete revision history
- Download the latest K-Pod Firmware.
Important - Please read before installing the latest Production Firmware
If you have firmware older than indicated below, please be sure to follow the steps below.
Production Firmware Installation Instructions are found in the Utility
- All Production Firmware is loaded with the K-Pod Utility. It will take care of the download and installing Production Firmware
- All steps to load Production Firmware is found in the latest version of the K-POD Owners Manual found on our web site.
- Before loading Production Firmware, please ensure you have installed the latest version of the K-Pod Utility
Download and Install the K-Pod Utility for your Operating SystemFollow the links below to download and install the latest version of the Utility for your Operating System. Minimum Operating System Requirements for Elecraft UtilitiesMicrosoft Windows: XP Service Pack 3 or later, including Vista, 7, 8, and 8.1 and 10.
|
Beta Firmware Installation and Release Notes
Beta Firmware Release Notes
--Not available at this time--
Beta Test Firmware Installation Procedures
NOTE: Beta test firmware may have new issues that we haven't caught during field testing. Please report them to support@elecraft.com.
A little more detail
We make it a little harder to load Beta firmware mainly because we want you to be sure you want to do this. Beta firmware means that, while the K-Pod engineering team has fully tested the firmware, it has not yet been deemed ready for Production status. You can always return to the last firmware you have downloaded by following the steps in the K-Pod Utility’s Help section.
To load Beta Firmware, follow the steps below:
1. Create a new folder for the beta firmware on your Desktop or some other easily found location. Use the a different folder than the default folder found in the Firmware tab of the Utility. In this way, you can revert to the last Production firmware easily.
2. Now, we will download the firmware in Zip file format. In a web browser, type in this URL:
https://ftp.elecraft.com/K-Pod/firmware/beta
If you do not see the correct version of the zip file, press the RELOAD / REFRESH button on your browser to update your browser cache.
3. Right-click on the .zip file containing the beta firmware (e.g. k3fwXrYZ.zip for revision MCU X.YZ and all associated files). Save the file to your beta folder you just created.
4. Unzip the files into the beta folder.
5. Enter the path to the beta folder in K-Pod Utility → Firmware tab → "Local folder for firmware files".
6. After you have made the change in Step 5, make sure you *DO NOT* check the K-Pod Utility box titled "Copy new files from Elecraft server". This will overwrite the Beta firmware if clicked.
7. Connect the K-Pod to your computer and be sure it is turned on. Select the Firmware tab and Click on "Check versions now" button.
8. Review the release notes. To find them, select the "Help" pull-down menu.
9. Click "Send all firmware to K-Pod." This will cause the firmware to be sent to the K-Pod. You will see that the K-Pod appears to restart itself. Monitor the Activity Log until it is complete.
10. After completing a new software download to your product, please power cycle the K-Pod OFF and then back ON before using it.
11. Please report any new firmware issues to support@elecraft.com
KX-Line Firmware and Software
View
COLLAPSE
KX3 High Performance Portable Transceiver Firmware and Utility
View
COLLAPSE
KX3 Current Production Firmware
MCU 3.02 / DSP 1.52, 4-8-2022
All KX3’s ordered today will have Production Firmware loaded as they come out of the box. Monitor the Elecraft Email Reflector where announcements are made when new releases become available.
Elecraft delivers new features in firmware. As a result, you should consider the Release Notes as an extension of the Owner's Manual. Documentation for the new features will be found there and will not appear in the Owner's Manual until the next major manual revision is released.
Current Production KX3 Firmware Release Notes
MCU 3.02 / DSP 1.52, 2-21-2022
- FIXED TX INHIBIT PROBLEM WITH ACC IO OUTPUT: Previously, when ACC IO was used as a TX inhibit output, keying in CW mode could lead to a “stuck” sidetone. This has been corrected for both the LO=INH and HI=INH settings of the ACC IO menu entry.
- MORE OPERATIMG TIME AT 10 W IN CW MODE: In CW mode, the KX3 now provides up to 10 W output as long as the supply is above 9.0 V (on key-down). In other modes the criteria for 10 W output is still 10.0 V. This is required to preserve low transmit IMD.
MCU 2.98 / DSP 1.52, 4-28-2019
- ATU TUNING IMPROVED WITH LOW SUPPLY/BATTERY VOLTAGE: ATU tuning should now be reliable down to as low as 8.5 V. Also increased relay settling time.
- See KX3 Firmware Release Notes for a complete revision history
- Download the latest KX3 Firmware.
These are the most Release Notes since the last Production firmware release. Please see your KX3 Utility → Help → Release Notes for all Release Notes listed in order of release.
Important - Please read before installing the latest Production Firmware
Production Firmware Installation Instructions are found in the Utility Help Facility
- All Production Firmware is loaded with the KX3 Utility. It will take care of the download and installing Production Firmware
- Before loading Production Firmware, please ensure you have installed the latest version of the KX3 Utility.
- See the Help → Getting Started pull-down menu in the KX3 Utility for the steps to install firmware in your radio.
Download and Install the KX3 Utility for your Operating SystemFollow the links below to download and install the latest version of the Utility for your Operating System. Minimum Operating System Requirements for Elecraft Utilities Microsoft Windows: XP Service Pack 3 or later, including Vista, 7, 8, and 8.1 and 10.
|
KX3 Beta Test Firmware Installation and Release Notes
KX3 Beta Test Firmware Release Notes
No Update At This Time
Beta Test Firmware Installation Procedures
NOTE: Beta test firmware may have new issues that we haven't caught during field testing. Please report them to support@elecraft.com.
A little more detail
We make it a little harder to load Beta firmware mainly because we want you to be sure you want to do this. Beta firmware means that, while the KX3 engineering team has fully tested the firmware, it has not yet been deemed ready for Production status. You can always return to the last firmware you have downloaded by following the steps in the KX3 Utility’s Help section.
To load Beta Firmware, follow the steps below:
1. Create a new folder for the beta firmware on your Desktop or some other easily found location. Use the a different folder than the default folder found in the Firmware tab of the Utility. In this way, you can revert to the last Production firmware easily.
2. Now, we will download the firmware in Zip file format. In a web browser, type in this URL:
https://ftp.elecraft.com/kx3/firmware/beta/
If you do not see the correct version of the zip file, press the RELOAD/REFRESH button onyour browser to update your browser cache.
3. Right-click on the .zip file containing the beta firmware (e.g. k3fwXrYZ.zip for revision MCU X.YZ and all associated files). Save the file to your beta folder you just created.
4. Unzip the files into the beta folder.
5. Enter the path to the beta folder in KX3 Utility → Firmware tab → "Local folder for firmware files".
6. After you have made the change in Step 5, make sure you *DO NOT* check the KX3 Utility box titled "Copy new files from Elecraft server". This will overwrite the Beta firmware if clicked.
7. Connect the KX3 to your computer and be sure it is turned on. Select the Firmware tab and Click on "Check versions now" button.
8. Review the release notes. To find them, select the "Help" pull-down menu.
9. Click "Send all firmware to KX3." This will cause the firmware to be sent to the KX3. You will see that the KX3 appears to restart itself. Monitor the Activity Log until it is complete.
10. After completing a new software download to your product, please power cycle the KX3 OFF and then back ON before using it.
11. Please report any new firmware issues to support@elecraft.com
KX2 Ultra-Portable Transceiver Firmware and Utility
View
COLLAPSE
Important - Please read before installing the latest Production Firmware
MCU 3.02 / DSP 1.52, 4-8-2022
All KX2’s ordered today will have Production Firmware loaded as they come out of the box. Monitor the Elecraft Email Reflector where announcements are made when new releases become available.
Elecraft delivers new features in firmware. As a result, you should consider the Release Notes as an extension of the Owners Manual. Documentation for the new features will be found there and will not appear in the Owner’s Manual until the next major manual revision is released.
Current Production KX2 Firmware Release Notes
MCU 3.02 / DSP 1.52, 3-18-2022
- MORE OPERATIMG TIME AT 10 W IN CW MODE: In CW mode, we now allow up to 10 W output as long as the supply is above 9 V (key-down). In other modes the criteria for 10 W output is still 10 V. This is required to preserve low transmit IMD.
MCU 3.01 / DSP 1.52, 11-20-2021
- KXIBC2 INTERNAL BATTERY CHARGER SUPPORT: If a KXIBC2 is installed, set MENU: KXIBC2 to NOR. This will allow the operator to optional monitor battery voltage by tapping DISP and selecting the “BT XX.X” display (by rotating the VFO B/OFS knob). Internal battery charging is automated and can be done with or without the radio turned on. When charging is in progress, the KXIBC2’s yellow LED is illuminated. For further details, refer to the KXIBC2 manual.
- See KX2 Firmware Release Notes for complete revision history
- Download the latest KX2 Firmware.
Important - Please read before installing the latest Production Firmware
Production Firmware Installation Instructions are found in the Utility Help Facility
- All Production Firmware is loaded with the KX2 Utility. It will take care of the download and installing Production Firmware
- Before loading Production Firmware, please ensure you have installed the latest version of the KX2 Utility.
- See the Help → Getting Started pull-down menu in the KX2 Utility for the steps to install firmware in your radio.
Download and Install the KX2 Utility for your Operating SystemFollow the links below to download and install the latest version of the Utility for your Operating System. Minimum Operating System Requirements for Elecraft UtilitiesMicrosoft Windows: XP Service Pack 3 or later, including Vista, 7, 8, and 8.1 and 10.
|
KX2 Beta Firmware Installation and Release Notes
KX2 Beta Test Firmware Release Notes
No Update At This Time
Beta Test Firmware Installation Procedures
NOTE: Beta test firmware may have new issues that we haven't caught during field testing. Please report them to support@elecraft.com.
A little more detail
We make it a little harder to load Beta firmware mainly because we want you to be sure you want to do this. Beta firmware means that, while the KX2 engineering team has fully tested the firmware, it has not yet been deemed ready for Production status. You can always return to the last firmware you have downloaded by following the steps in the KX2 Utility’s Help section.
To load Beta Firmware, follow the steps below:
1. Create a new folder for the beta firmware on your Desktop or some other easily found location. Use the a different folder than the default folder found in the Firmware tab of the Utility. In this way, you can revert to the last Production firmware easily.
2. Now, we will download the firmware in Zip file format. In a web browser, type in this URL:
https://ftp.elecraft.com/KX2/firmware/beta/
If you do not see the correct version of the zip file, press the RELOAD/REFRESH button on our browser to update your browser cache.
3. Right-click on the .zip file containing the beta firmware (e.g. k3fwXrYZ.zip for revision MCU X.YZ and all associated files). Save the file to your beta folder you just created.
4. Unzip the files into the beta folder.
5. Enter the path to the beta folder in KX2 Utility → Firmware tab → "Local folder for firmware files".
6. After you have made the change in Step 5, make sure you *DO NOT* check the KX2 Utility box titled "Copy new files from Elecraft server". This will overwrite the Beta firmware if clicked.
7. Connect the KX2 to your computer and be sure it is turned on. Select the Firmware tab and Click on "Check versions now" button.
8. Review the release notes. To find them, select the "Help" pull-down menu.
9. Click "Send all firmware to KX2." This will cause the firmware to be sent to the KX2. You will see that the KX2 appears to restart itself. Monitor the Activity Log until it is complete.
10. After completing a new software download to your product, please power cycle the KX2 OFF and then back ON before using it.
11. Please report any new firmware issues to support@elecraft.com
KXPA100 100 Watt Linear Amplifier Firmware and Utility
View
COLLAPSE
KXPA100 Current Production Firmware
MCU 1.39, 12-8-2016
All KXPA100’s ordered today will have Production Firmware loaded as they come out of the box. Monitor the Elecraft Email Reflector where announcements are made when new releases become available.
Elecraft delivers new features in firmware. As a result, you should consider the Release Notes as an extension of the Owner's Manual. Documentation for the new features will be found there and will not appear in the Owner's Manual until the next major manual revision is released.
Current Production KXPA100 Firmware Release Notes
- Widen timing window to more reliably detect push button switch presses.
- Enable PX3 image capture through KXPA100.
- Requires updated PX3 Utility and PX3 firmware.
- Change PC side RS-232 to 1 stop bit when transferring image.
- Add manual switch to disable amplifier with ATU available:
- MODE button HOLD now toggles power amplifier bypass.
- Power ON LED blinks slowly when PA is bypassed.
- See KXPA100 Firmware Release Notes for complete revision history.
- Download the latest KXPA100 Firmware
These are the most Release Notes since the last Production firmware release. Please see your KXPA100 Utility → Help → Release Notes for all Release Notes listed in order of release.
Important - Please read before installing the latest Production Firmware
Production Firmware Installation Instructions are found in the Utility Help Facility
- All Production Firmware is loaded with the KXPA100 Utility. It will take care of the download and installing Production Firmware
- Before loading Production Firmware, please ensure you have installed the latest version of the KXPA100 Utility.
- See the Help → Getting Started pull-down menu in the KXPA100 Utility for the steps to install firmware in your radio.
Download and Install the KXPA100 Utility for your Operating SystemFollow the links below to download and install the latest version of the Utility for your Operating System. Microsoft Windows: XP Service Pack 3 or later, including Vista, 7, 8, and 8.1 and 10.
|
KXPA100 Beta Firmware Installation and Release Notes
KXPA100 Beta Firmware Release Notes
None Right Now!
Beta Test Firmware Installation Procedures
NOTE: Beta test firmware may have new issues that we haven't caught during field testing. Please report them to support@elecraft.com.
A little more detail
We make it a little harder to load Beta firmware mainly because we want you to be sure you want to do this. Beta firmware means that, while the KXPA100 engineering team has fully tested the firmware, it has not yet been deemed ready for Production status. You can always return to the last firmware you have downloaded by following the steps in the KXPA100 Utility’s Help section.
To load Beta Firmware, follow the steps below:
1. Create a new folder for the beta firmware on your Desktop or some other easily found location. Use the a different folder than the default folder found in the Firmware tab of the Utility. In this way, you can revert to the last Production firmware easily.
2. Now, we will download the firmware in Zip file format. In a web browser, type in this URL:
https://ftp.elecraft.com/KXPA/firmware/beta/
If you do not see the correct version of the zip file, press the RELOAD/REFRESH button on our browser to update your browser cache.
3. Right-click on the .zip file containing the beta firmware (e.g. k3fwXrYZ.zip for revision MCU X.YZ and all associated files). Save the file to your beta folder you just created.
4. Unzip the files into the beta folder.
5. Enter the path to the beta folder in KXPA100 Utility → Firmware tab → "Local folder for firmware files".
6. After you have made the change in Step 5, make sure you *DO NOT* check the KXPA100 Utility box titled "Copy new files from Elecraft server". This will overwrite the Beta firmware if clicked.
7. Connect the KXPA100 to your computer and be sure it is turned on. Select the Firmware tab and Click on "Check versions now" button.
8. Review the release notes. To find them, select the "Help" pull-down menu.
9. Click "Send all firmware to KXPA100." This will cause the firmware to be sent to the KXPA100. You will see that the KXPA100 appears to restart itself. Monitor the Activity Log until it is complete.
10. After completing a new software download to your product, please power cycle the KXPA100 OFF and then back ON before using it.
11. Please report any new firmware issues to support@elecraft.com
PX3 High Performance Portable Panadapter Firmware and Utility
View
COLLAPSE
PX3 Current Production Firmware
MCU 1.48, 2-8-2017
All PX3’s ordered today will have Production Firmware loaded as they come out of the box. Monitor the Elecraft Email Reflector where announcements are made when new releases become available.
Elecraft delivers new features in firmware. As a result, you should consider the Release Notes as an extension of the Owner's Manual. Documentation for the new features will be found there and will not appear in the Owner’s Manual until the next major manual revision is released.
Current Production PX3 Firmware Release Notes
Please use the latest version of the PX3 Utility.
Rev. 1.16 or later of the PX3 requires KX3 firmware version 2.27 or later
- Note: refer to the latest PX3 manual for more information regarding these new features.
- Adds: USB MSD (mass storage device, memory stick, thumb drive) support. Most types of flash drives are supported. Added a new sub-menu called “MSD menu” which includes the following features.
- Adds: Serial commands #MAA, #MBA to adjust A or B markers by an incrementing or decrementing. The adjustment value is the same as used by the K3/KX3 UP and DN commands.
- Adds: Frequency displays now show all digits including the Hz digit. This includes the center frequency adjustment and marker values. Note that markers adjust by values determined by the current span setting.
- Adds: To enter the text decode scratchpad, you can now use either Insert or Alt-P. To send the scratchpad, you can now use either Ctrl-Insert or Ctrl-P .
- Adds: #MSS msd screen shot serial command
- See PX3 Firmware Release Notes for complete revision history
- Download the latest PX3 Firmware
Important - Please read before installing the latest Production Firmware
Production Firmware Installation Instructions are found in the Utility Help Facility
- All Production Firmware is loaded with the PX3 Utility. It will take care of the download and installing Production Firmware
- Before loading Production Firmware, please ensure you have installed the latest version of the PX3 Utility.
- See the Help → Getting Started pull-down menu in the PX3 Utility for the steps to install firmware in your radio.
Download and Install the PX3 Utility for your Operating SystemFollow the links below to download and install the latest version of the Utility for your Operating System. Minimum Operating System Requirements for Elecraft UtilitiesMicrosoft Windows: XP Service Pack 3 or later, including Vista, 7, 8, and 8.1 and 10.
|
PX3 Beta Firmware Installation and Release Notes
PX3 Beta Firmware Release Notes
None Right Now!
Beta Test Firmware Installation Procedures
NOTE: Beta test firmware may have new issues that we haven't caught during field testing. Please report them to support@elecraft.com.
A little more detail
We make it a little harder to load Beta firmware mainly because we want you to be sure you want to do this. Beta firmware means that, while the PX3 engineering team has fully tested the firmware, it has not yet been deemed ready for Production status. You can always return to the last firmware you have downloaded by following the steps in the PX3 Utility’s Help section.
To load Beta Firmware, follow the steps below:
1. Create a new folder for the beta firmware on your Desktop or some other easily found location. Use the a different folder than the default folder found in the Firmware tab of the Utility. In this way, you can revert to the last Production firmware easily.
2. Now, we will download the firmware in Zip file format. In a web browser, type in this URL:
https://ftp.elecraft.com/PX3/firmware/beta/
If you do not see the correct version of the zip file, press the RELOAD/REFRESH button on our browser to update your browser cache.
3. Right-click on the .zip file containing the beta firmware (e.g. k3fwXrYZ.zip for revision MCU X.YZ and all associated files). Save the file to your beta folder you just created.
4. Unzip the files into the beta folder.
5. Enter the path to the beta folder in PX3 Utility → Firmware tab → "Local folder for firmware files".
6. After you have made the change in Step 5, make sure you *DO NOT* check the PX3 Utility box titled "Copy new files from Elecraft server". This will overwrite the Beta firmware if clicked.
7. Connect the PX3 to your computer and be sure it is turned on. Select the Firmware tab and Click on "Check versions now" button.
8. Review the release notes. To find them, select the "Help" pull-down menu.
9. Click "Send all firmware to PX3." This will cause the firmware to be sent to the PX3. You will see that the PX3 appears to restart itself. Monitor the Activity Log until it is complete.
10. After completing a new software download to your product, please power cycle the PX3 OFF and then back ON before using it.
11. Please report any new firmware issues to support@elecraft.com
KH-Line Firmware and Software
View
COLLAPSE
KH1 Hand-Held 5-Band CW Transceiver Firmware and Utility
View
COLLAPSE
Important - Please read before installing the latest Production Firmware
KH1 MCU 1.27 1-12-2026
All KH1’s ordered today will have Production Firmware loaded as they come out of the box. Monitor the Elecraft Email Reflector where announcements are made when new releases become available.
Elecraft delivers new features in firmware. As a result, consider the Release Notes as an extension of the Owners Manual. Documentation for the new features will be found there and will not appear in the Owner’s Manual until the next major manual revision is released.
Current Production KH1 Firmware Release Notes
KH1 MCU 1.27, 12 01. 2026
- FT8 transmit capability for SOTA self-ID in the field
- Full Morse audio user interface
- See KH1 Firmware Release Notes for complete revision history
- Download the latest KH1 Firmware.
Important - Please read before installing the latest Production Firmware
Production Firmware Installation Instructions are found in the Utility Help Facility
- All Production Firmware is loaded with the KH1 Utility. It will take care of the download and installing Production Firmware
- Before loading Production Firmware, please ensure you have installed the latest version of the KH1 Utility.
- See the Help → Getting Started pull-down menu in the KH1 Utility for the steps to install firmware in your radio. Firmware installation is also covered in detail in the UPDATING FIRMWARE section of the KH1 owner's manual.
Download and Install the KH1 Utility for your Operating SystemFollow the links below to download and install the latest version of the Utility for your Operating System. Minimum Operating System Requirements for Elecraft UtilitiesMicrosoft Windows XP Service Pack 3 through Windows 11.
|
Amplifier Firmware and Software
View
COLLAPSE
KPA1500 1500 Watt Linear Amplifier Firmware and Utility
View
COLLAPSE
Current KPA1500 Production Firmware
MCU 03.06 7/30/2025
All KPA1500 amplifiers ordered today will have Product Firmware loaded as they come out of the box. Monitor the Elecraft Email Reflector where announcements are made when new releases become available.
Elecraft delivers new features in firmware. As a result, you should consider the Release Notes as an extension of the Owners Manual. Documentation for the new features will be found there and will not appear in the Owner’s Manual until the next major manual revision is released.
Current Production Firmware Release Notes
03.06 7/30/2025
-
Bugfix: ^APxx; response for antennas 10 thru 32 corrected.
-
ATU status page shows frequency range of selected setting, e.g. 14020-14039.
-
See KPA1500 Firmware Release Notes for complete revision history
- Download the latest KPA1500 Firmware.
Important - Please read before installing the latest Production Firmware
Production Firmware Installation Instructions are found in the Utility
- All Production Firmware is loaded with the KPA1500 Utility. It will take care of the download and installing Production Firmware
- Before loading Production Firmware, please ensure you have installed the latest version of the KPA1500 Utility.
- See the Help → Getting Started pull-down menu in the KPA1500 Utility for the steps to install firmware in your KPA1500.
Download and Install the KPA1500 Utility for your Operating SystemFollow the links below to download and install the latest version of the Utility for your Operating System. You will be using the USB A-to-B cable that was shipped with the KPA1500.
Minimum Operating System Requirements for Elecraft UtilitiesMicrosoft Windows: XP Service Pack 3 or later, including Vista, 7, 8, and 8.1 and 10.
|
Beta Firmware Installation and Release Notes
Beta Firmware Release Notes
03.07 11/14/2025
- Add commands ^TX, ^RX, ^TQ to simulate pulling KEY IN down. See 3.07 update to
KPA1500 Programing Reference. - Pause ATU tuning if forward power exceeds 100W to avoid switching ATU relays with too much exciter power. Display LCD message if this occurs.
- LCD shows forward power if too low (< 5 W) or too high (> 100W) for ATU tuning to
progress. Exciter foldback is common during ATU tune. - Switch VFWD/VREV to high power range if forward power exceeds 200W.
03.03 6/11/2024
^EM command accepts lower case "ab" for all band ATU memory erase.
03.02 6/3/2024
- Set SWR bypass from most recently loaded ATU setting in recall tunes
- Fix HiSWR retune regression introduced in 2.64
- Add ^ON/; toggle. If power is on, ^ON/; turns power off. If power is off, ^ON/; turns power on.
03.01 10/26/2023
- Display LCD antenna change message only if any of ANT3 thru ANT32 are enabled on theCURRENT band.
- Extend transient LCD message display time from 1.5 to 2.5 seconds.
03.00 9/26/2023
- Save your existing version 2.xx configuration before installing this firmware, and restore that saved configuration should you revert to an earlier firmware version.
- The existing amplifier configuration is reset on first start after installing this firmware version. ATU settings are preserved. Use the KPA1500 Utility Configuration tab, Edit Configuration to review your configuration.
- Extend antenna numbering up to 32 antennas on each band. An external device may be used to inform KPA1500 of antenna changes by sending an ^AN command, or press the KPA1500 front panel ANTENNA button to advance through enabled antennas. ATU settings are stored and recalled by antenna number 1 through 32. Antennas 3 through 32 are routed through KPA1500 rear-panel "connector" ANT 1 or ANT 2. See ^AE (Antenna Enable) in the new KPA1500 V3 Programming Reference for details.
- The KPA1500 Utility configuration tab has not yet been extended to support these new antenna numbers; use the Utility command tester tab and KPA1500 V3 Programming Reference to enter new forms of ^AE (antenna enable), ^AM (ATU Mode), ^AN (change antenna), ^AP (preferred antenna), and ^EM (erase ATU settings).
- Extend ANTENNA PREFER and ATU MEM ERASE menu items; select the appropriate antenna by advancing through enabled antennas with the front panel ANTENNA button.
- A new LCD status page shows the currently selected antenna number, band, and antenna connector. If Antenna number 3-32 is selected, the ANT LEDs also show the antenna connector being used.
- Change the ANTENNA ENABLE menu item to ANT ENABL and show the antennas enabled on the current band (all those that fit within 16 characters).
- Each "bin" (frequency segment) now has room for 32 ATU settings. Use ^AB (ATU settings per bin) to limit the number of settings used for each antenna number. For example, if you have 8 enabled antenna numbers on a given band, it might be helpful to limit each antenna to use 2 or 4 ATU settings in each bin.
- Show antenna number in a transient LCD display on antenna changes, including connector number if antenna number 3 through 32 is selected. This display is not shown if antenna 3 through 32 are disabled on all bands; the ANT 1 and ANT 2 LEDs suffice.
- ^DF command response now shows number of unused ATU settings
- Resequence FAN SPEED DWELL menu item after FAN SPEED
Beta Test Firmware Installation Procedures
NOTE: Beta test firmware may have new issues that we haven't caught during field testing. Please report them to support@elecraft.com.
A little more detail
We make it a little harder to load Beta firmware mainly because we want you to be sure you want to do this. Beta firmware means that, while the KPA1500 engineering team has fully tested the firmware, it has not yet been deemed ready for Production status. You can always return to the last firmware you have downloaded by following the steps in the KPA1500 Utility’s Help section.
To load Beta Firmware, follow the steps below:
1. Create a new folder for the beta firmware on your Desktop or some other easily found location. Use the a different folder than the default folder found in the Firmware tab of the KPA1500 Utility. In this way, you can revert to the last Production firmware easily.
2. Now, we will download the firmware in Zip file format. In a web browser, type in this URL: https://ftp.elecraft.com/KPA1500/firmware/beta
If you do not see the correct version of the zip file, press the RELOAD/REFRESH button on your browser to update your browser cache.
3. Right-click on the .zip file containing the beta firmware (e.g. KPA1500fwXrYZ.zip for revision MCU X.YZ and all associated files). Save the file to your beta folder you just created.
4. Unzip the files into the beta folder.
5. Enter the path to the beta folder in KPA1500 Utility → Firmware tab → "Local folder for firmware files".
6. After you have made the change in Step 5, make sure you *DO NOT* check the KPA1500 Utility box titled "Copy new files from Elecraft server". This will overwrite the Beta firmware if clicked.
7. Connect the KPA1500 to your computer and be sure it is turned on. Select the Firmware tab and Click on "Check versions now" button.
8. Review the release notes. To find them, select the "Help" pull-down menu.
9. Click "Send all firmware to KPA1500." This will cause the firmware to be sent to the KPA1500. You will see that the KPA1500 appears to restart itself. Monitor the Activity Log until it is complete.
10. After completing a new software download to your product, please power cycle the KPA1500 OFF and then back ON before using it.
Please report any new firmware issues to support@elecraft.com.
KPA500 500 Watt Linear Amplifier Firmware and Utility
View
COLLAPSE
Current KPA500 Production Firmware
All KPA500 amplifiers ordered today will have Product Firmware loaded as they come out of the box. Monitor the Elecraft Email Reflector where announcements are made when new releases become available.
Elecraft delivers new features in firmware. As a result, you should consider the Release Notes as an extension of the Owners Manual. Documentation for the new features will be found there and will not appear in the Owner’s Manual until the next major manual revision is released.
Current Production Firmware Release Notes
- Added internal factory settings to optimize production of KPA500 product. No new operator features added to this release.
- Frequency count now requires at least 1/2 watt input power to be valid. This corrects rare issue with unexpected band change in SSB operation. All Faults may now be reset through serial port.
- Corrected issue with periodic switching from STBY to OPER when no band signals are connect, BCD or K3 RADIO mode is set, and PWR ON->OPER is set.
- See KPA500 Firmware Release Notes for a complete revision history
- Download the latest KPA500 Firmware.
Important - Please read before installing the latest Production Firmware
Production Firmware Installation Instructions are found in the Utility
- All Production Firmware is loaded with the KPA500 Utility. It will take care of the download and installing Production Firmware
- Before loading Production Firmware, please ensure you have installed the latest version of the KPA500 Utility.
- See the Help → Getting Started pull-down menu in the KPA500 Utility for the steps to install firmware in your KPA500.
Download and Install the KPA500 Utility for your Operating SystemFollow the links below to download and install the latest version of the Utility for your Operating System. Note: For KPAK3AUX cable use between the KPA500 and K3, K3 Firmware Version 4.36 or later must be loaded. Minimum Operating System Requirements for Elecraft UtilitiesMicrosoft Windows: XP Service Pack 3 or later, including Vista, 7, 8, and 8.1 and 10.Apple Mac: OS X 10.6 (Snow Leopard) or later |
| Windows | KPA Utility (Windows Version 1.13.7.16) July 16, 2013 |
| Macintosh | KPA Utility (64bit MAC OS X 64 bit Version 1.19.9.6) September 12, 2019 |
| X86 Linux |
KPA Utility (64bit Linux .tgz 64 bit Version 1.19.9.6) September 12, 2019
The following libraries and dependencies should be installed on your Linux distro: GTK+ 2.8 or later, glibc-2.4, libstdc++.so.6 and cURL. 64-bit Linux requires 32-bit compatibility libraries. |
| Installing the FTDI driver | Follow this link to the FTDI Site for drivers: http://www.ftdichip.com/Drivers/VCP.htm Depending on the Operating System you have, the driver needed for the Utility to communicate with the KPA500 will need to be loaded. All Elecraft products in production use the FTDI chipset for this function. The FTDI driver allows your computer to create a virtual COM port so that the Utility can communicate with the Elecraft product. For the KPA500, if your KUSB cable has a silver sheath on the wire, it is no longer supported. Elecraft recommends that a KUSB cable be purchased for full support. |
Beta Firmware Installation and Release Notes
Beta Firmware Release Notes
None right now!
Beta Test Firmware Installation Procedures
NOTE: Beta test firmware may have new issues that we haven't caught during field testing. Please report them to support@elecraft.com.
A little more detail
We make it a little harder to load Beta firmware mainly because we want you to be sure you want to do this. Beta firmware means that, while the KPA500 engineering team has fully tested the firmware, it has not yet been deemed ready for Production status. You can always return to the last firmware you have downloaded by following the steps in the KPA500 Utility’s Help section.
To load Beta Firmware, follow the steps below:
1. Create a new folder for the beta firmware on your Desktop or some other easily found location. Use the a different folder than the default folder found in the Firmware tab of the KPA500 Utility. In this way, you can revert to the last Production firmware easily.
2. Now, we will download the firmware in Zip file format. In a web browser, type in this URL: https://ftp.elecraft.com/KPA/firmware/beta
If you do not see the correct version of the zip file, press the RELOAD/REFRESH button on your browser to update your browser cache.
3. Right-click on the .zip file containing the beta firmware (e.g. KPA500fwXrYZ.zip for revision MCU X.YZ and all associated files). Save the file to your beta folder you just created.
4. Unzip the files into the beta folder.
5. Enter the path to the beta folder in KPA500 Utility → Firmware tab → "Local folder for firmware files".
6. After you have made the change in Step 5, make sure you *DO NOT* check the KPA500 Utility box titled "Copy new files from Elecraft server". This will overwrite the Beta firmware if clicked.
7. Connect the KPA500 to your computer and be sure it is turned on. Select the Firmware tab and Click on "Check versions now" button.
8. Review the release notes. To find them, select the "Help" pull-down menu.
9. Click "Send all firmware to KPA500." This will cause the firmware to be sent to the KPA500. You will see that the KPA500 appears to restart itself. Monitor the Activity Log until it is complete.
10. After completing a new software download to your product, please power cycle the KPA500 OFF and then back ON before using it.
11. Please report any new firmware issues to support@elecraft.com
KXPA100 100 Watt Linear Amplifier Firmware and Utility
View
COLLAPSE
KXPA100 Current Production Firmware
MCU 1.39, 12-8-2016
All KXPA100’s ordered today will have Production Firmware loaded as they come out of the box. Monitor the Elecraft Email Reflector where announcements are made when new releases become available.
Elecraft delivers new features in firmware. As a result, you should consider the Release Notes as an extension of the Owner's Manual. Documentation for the new features will be found there and will not appear in the Owner's Manual until the next major manual revision is released.
Current Production KXPA100 Firmware Release Notes
- Widen timing window to more reliably detect push button switch presses.
- Enable PX3 image capture through KXPA100.
- Requires updated PX3 Utility and PX3 firmware.
- Change PC side RS-232 to 1 stop bit when transferring image.
- Add manual switch to disable amplifier with ATU available:
- MODE button HOLD now toggles power amplifier bypass.
- Power ON LED blinks slowly when PA is bypassed.
- See KXPA100 Firmware Release Notes for complete revision history.
- Download the latest KXPA100 Firmware
These are the most Release Notes since the last Production firmware release. Please see your KXPA100 Utility → Help → Release Notes for all Release Notes listed in order of release.
Important - Please read before installing the latest Production Firmware
Production Firmware Installation Instructions are found in the Utility Help Facility
- All Production Firmware is loaded with the KXPA100 Utility. It will take care of the download and installing Production Firmware
- Before loading Production Firmware, please ensure you have installed the latest version of the KXPA100 Utility.
- See the Help → Getting Started pull-down menu in the KXPA100 Utility for the steps to install firmware in your radio.
Download and Install the KXPA100 Utility for your Operating SystemFollow the links below to download and install the latest version of the Utility for your Operating System. Microsoft Windows: XP Service Pack 3 or later, including Vista, 7, 8, and 8.1 and 10.
|
KXPA100 Beta Firmware Installation and Release Notes
KXPA100 Beta Firmware Release Notes
None Right Now!
Beta Test Firmware Installation Procedures
NOTE: Beta test firmware may have new issues that we haven't caught during field testing. Please report them to support@elecraft.com.
A little more detail
We make it a little harder to load Beta firmware mainly because we want you to be sure you want to do this. Beta firmware means that, while the KXPA100 engineering team has fully tested the firmware, it has not yet been deemed ready for Production status. You can always return to the last firmware you have downloaded by following the steps in the KXPA100 Utility’s Help section.
To load Beta Firmware, follow the steps below:
1. Create a new folder for the beta firmware on your Desktop or some other easily found location. Use the a different folder than the default folder found in the Firmware tab of the Utility. In this way, you can revert to the last Production firmware easily.
2. Now, we will download the firmware in Zip file format. In a web browser, type in this URL:
https://ftp.elecraft.com/KXPA/firmware/beta/
If you do not see the correct version of the zip file, press the RELOAD/REFRESH button on our browser to update your browser cache.
3. Right-click on the .zip file containing the beta firmware (e.g. k3fwXrYZ.zip for revision MCU X.YZ and all associated files). Save the file to your beta folder you just created.
4. Unzip the files into the beta folder.
5. Enter the path to the beta folder in KXPA100 Utility → Firmware tab → "Local folder for firmware files".
6. After you have made the change in Step 5, make sure you *DO NOT* check the KXPA100 Utility box titled "Copy new files from Elecraft server". This will overwrite the Beta firmware if clicked.
7. Connect the KXPA100 to your computer and be sure it is turned on. Select the Firmware tab and Click on "Check versions now" button.
8. Review the release notes. To find them, select the "Help" pull-down menu.
9. Click "Send all firmware to KXPA100." This will cause the firmware to be sent to the KXPA100. You will see that the KXPA100 appears to restart itself. Monitor the Activity Log until it is complete.
10. After completing a new software download to your product, please power cycle the KXPA100 OFF and then back ON before using it.
11. Please report any new firmware issues to support@elecraft.com
Radio Accessories Firmware and Software
View
COLLAPSE
KRC2 Firmware and Program Downloads
View
COLLAPSE
KRC2 FIRMWARE AND PROGRAM DOWNLOADS
|
(1.4 MB) V1.1 program to download new firmware to the KRC2 from your PC.
|
|
|
(38 KB) KRC2 Firmware V1.6 (Oct 5, 2011) (Download and then open with the KRC2 Downloader.)
|
|
|
(38 KB) KRC2ACC Firmware V1.6 (Oct 5, 2011) (Download and then open with the KRC2 Downloader.)
|
KRC2 CONFIGURATION PROGRAMMER SOFTWARE
The software provided for download on this section is provided as a free service to our customers and is provided as-is without warranty.
| KRC2 Config Installer | KRC2 Config Installer for Windows (.exe file) |
| KRC2 Config Visual Basic Program | Installing and running the Elecraft KRC2 Config Visual Basic Program (.pdf) |
| KRC2 Firmware Loader Supported Platforms | Available for Windows 98, 2000, ME, XP |
Test Equipment Line Firmware and Software
View
COLLAPSE
XG3 Firmware and Utility
View
COLLAPSE
Current Production Firmware:
REV 1.19, 2-6-2017
All XG3 signal source ordered today will have Product Firmware loaded as they come out of the box. Monitor the Elecraft Email Reflector where announcements are made when new releases become available.
Elecraft delivers new features in firmware. As a result, you should consider the Release Notes as an extension of the Owner's Manual. Documentation for the new features will be found there and will not appear in the Owner's Manual until the next major manual revision is released.
Current Production Firmware Release Notes
- The serial command ‘W’ can now interpret the same meta-characters that the Morse memory (WM) command utilizes. This allows the XG3 Utility’s Command Tester to invoke a variety of complex macros using the programmable buttons in the Utility. Macros executed via the ‘W’ command can contain up to 93 characters.
- See XG3 Signal Source Firmware Release Notes for complete revision history
- Download the latest XG3 Signal Source Firmware
Production Firmware Installation Instructions are found in the Utility
- All Production Firmware is loaded with the XG3 Utility. It will take care of the download and installing Production Firmware
- Before loading Production Firmware, please ensure you have installed the latest version of the XG3 Utility.
- See the Help → Getting Started pull-down menu in the K3 Utility for the steps to install firmware in your XG3.
Download and Install the XG3 Utility for your Operating SystemFollow the links below to download and install the latest version of the Utility for your Operating System.
Minimum Operating System Requirements for Elecraft Utilities
Microsoft Windows: XP Service Pack 3 or later, including Vista, 7, 8, and 8.1 and 10.
Apple Mac: OS X 10.6 (Snow Leopard) or later
|
Beta Firmware Installation and Release Notes
Beta Firmware Release Notes
None Right Now!
Beta Test Firmware Installation Procedures
NOTE: Beta test firmware may have new issues that we haven't caught during field testing. Please report them to support@elecraft.com.
A little more detail
We make it a little harder to load Beta firmware mainly because we want you to be sure you want to do this. Beta firmware means that, while the XG3 engineering team has fully tested the firmware, it has not yet been deemed ready for Production status. You can always return to the last firmware you have downloaded by following the steps in the XG3 Utility’s Help section.
To load Beta Firmware, follow the steps below:
1. Create a new folder for the beta firmware on your Desktop or some other easily found location. Use the a different folder than the default folder found in the Firmware tab of the Utility. In this way, you can revert to the last Production firmware easily.
2. Now, we will download the firmware in Zip file format. In a web browser, type in this URL:
https://ftp.elecraft.com/XG3/firmware/beta
If you do not see the correct version of the zip file, press the RELOAD / REFRESH button on your browser to update your browser cache.
3. Right-click on the .zip file containing the beta firmware (e.g. k3fwXrYZ.zip for revision MCU X.YZ and all associated files). Save the file to your beta folder you just created.
4. Unzip the files into the beta folder.
5. Enter the path to the beta folder in XG3 Utility → Firmware tab → "Local folder for firmware files".
6. After you have made the change in Step 5, make sure you *DO NOT* check the XG3 Utility box titled "Copy new files from Elecraft server". This will overwrite the Beta firmware if clicked.
7. Connect the XG3 to your computer and be sure it is turned on. Select the Firmware tab and Click on "Check versions now" button.
8. Review the release notes. To find them, select the "Help" pull-down menu.
9. Click "Send all firmware to XG3." This will cause the firmware to be sent to the XG3. You will see that the XG3 appears to restart itself. Monitor the Activity Log until it is complete.
10. After completing a new software download to your product, please power cycle the XG3 OFF and then back ON before using it.
11. Please report any new firmware issues to support@elecraft.com
W2 Firmware and Utility
View
COLLAPSE
W2 Current Production Firmware:
V1.00, 4-12-2010
All W2 SWR/Power meters ordered today will have Product Firmware loaded as they come out of the box. Monitor the Elecraft Email Reflector where announcements are made when new releases become available.
Elecraft delivers new features in firmware. As a result, you should consider the Release Notes as an extension of the Owner's Manual. Documentation for the new features will be found there and will not appear in the Owner's Manual until the next major manual revision is released.
Current Production Firmware Release Notes
- SWR ACCURACY: As a result of our continuing product improvement, a different algorithm is now used to calculate the SWR value. Besides offering greater accuracy at lower power levels, the SWR data available from the Serial Port now reports the range of 1.00:1 to 99.99:1, giving much finer resolution of SWR readings.
- SWR ALARM CHANGES: The trip points for the SWR Alarm now match the SWR LED’s on the front panel of the W2. The range is still 1.1:1 to 5.0:1. Sending the W2 a “[” lowers the trip point, and “]” raises the trip point. Note the decimal point is implied in the serial response, i.e. “[25;” means the trip point was lowered to an SWR of 2.5:1 and “]40” means the trip point was raised to 4.0:1.
- SWR ALARM RESPONSE TIME: You can use the “PTT RY” RCA connectors on the back of the W2 to help protect your amp in case of high SWR. The response time that it takes for the relay to trip has been improved and can now catch an “I” sent at 60 WPM.
- SERIAL COMMAND CHANGES: The Serial Command set has had some minor changes in output format.
- See W2 Firmware Release Notes for complete revision history
- Download the latest W2 Firmware.
Important - Please read before installing the latest Production Firmware
If you have firmware older than indicated below, please be sure to follow the steps below.
***No special instructions at this time***
Production Firmware Installation Instructions are found in the Utility
- All Production Firmware is loaded with the W2 Utility. It will take care of the download and installing Production Firmware
- Before loading Production Firmware, please ensure you have installed the latest version of the W2 Utility.
- See the Help → Getting Started pull-down menu in the W2 Utility for the steps to install firmware in your W2.
Download and Install the W2 Utility for your Operating SystemFollow the links below to download and install the latest version of the Utility for your Operating System.
You will be connecting the W2 to the computer with a KXUSB cable that was included with the W2 when it was shipped from the factory.
Minimum Operating System Requirements for Elecraft Utilities
Microsoft Windows: XP Service Pack 3 or later, including Vista, 7, 8, and 8.1 and 10.
Apple Mac: OS X 10.6 (Snow Leopard) or later
|
W2 Wattmeter / SWR Bridge Software
The software provided for download on this page is provided as a free service to our customers and is provided as-is without warranty. W2 Automatic Power On Modification - Easy one solder jumper mod lets your W2 automatically power on/off with +12VDC from your K3 or your shack's master power supply.
Elecraft W2 Interface program (Ver 1.12.1.18) Please note this version requires at minimum W2 Firmware Rev 1.00.
Main Form (Windows version) Setup Form (Windows version) Read about the latest updates in this version W2 Interface (Windows Version)
|


Beta Firmware Installation and Release Notes
No Beta Firmware candidate at this time
Beta Firmware Release Notes
Beta Test Firmware Installation Procedures
NOTE: Beta test firmware may have new issues that we haven't caught during field testing. Please report them to support@elecraft.com.
A little more detail
We make it a little harder to load Beta firmware mainly because we want you to be sure you want to do this. Beta firmware means that, while the W2 engineering team has fully tested the firmware, it has not yet been deemed ready for Production status. You can always return to the last firmware you have downloaded by following the steps in the W2 Utility’s Help section.
To load Beta Firmware, follow the steps below:
1. Create a new folder for the beta firmware on your Desktop or some other easily found location. Use the a different folder than the default folder found in the Firmware tab of the Utility. In this way, you can revert to the last Production firmware easily.
2. Now, we will download the firmware in Zip file format. In a web browser, type in this URL:
https://ftp.elecraft.com/W2/firmware/beta
If you do not see the correct version of the zip file, press the RELOAD / REFRESH button on your browser to update your browser cache.
3. Right-click on the .zip file containing the beta firmware. Save the file to your beta folder you just created.
4. Unzip the files into the beta folder.
5. Enter the path to the beta folder in W2 Utility → Firmware tab → "Local folder for firmware files".
6. After you have made the change in Step 5, make sure you *DO NOT* check the W2 Utility box titled "Copy new files from Elecraft server". This will overwrite the Beta firmware if clicked.
7. Connect the W2 to your computer and be sure it is turned on. Select the Firmware tab and Click on "Check versions now" button.
8. Review the release notes. To find them, select the "Help" pull-down menu.
9. Click "Send all firmware to W2." This will cause the firmware to be sent to the W2. You will see that the W2 appears to restart itself. Monitor the Activity Log until it is complete.
10. After completing a new software download to your product, please power cycle the W2 OFF and then back ON before using it.
11. Please report any new firmware issues to support@elecraft.com
W1 Wattmeter / SWR Bridge Software
View
COLLAPSE
The software provided for download on this page is provided as a free service to our customers and is provided as-is without warranty.

W1 Software Install Package for Windows V1.10 (.zip)
W1 Visual Basic 6 Source Code (.zip)
W1 Serial Interface Command Set (.pdf)
V1.10 adds a new 'settings' pull down menu that allows you to change the default LED behavior on the W1.
The Menu commands are:
- Average Power LEDs
- Peak Power LEDS (Default)
- Average Power Serial Data
- Peak Power Serial Data (Default)
- Slow Led Decay
- Medium LEd Decay (Default)
- Fast LED Decay
- Slow Range Drop
- Medium Range Drop (Default)
- Fast Range Drop
- Peak Hold LED On ( (Default is OFF)
- Save (Stored selected values in W1 EEPROM as Power-On Defaults)
These changes take effect on the W1 LEDs immediately, but are not saved as Power-On Defaults until the 'Save' command is clicked on.
Installing and running the Elecraft W1 Visual Basic program. (Link to text file)
This software has been tested on Windows XP, SP2.
Installing:
Our VisualBasic version of the W1 program comes in a "deployment" package. Copy the zipped file into a temporary directory, unzip the contents into a sub folder and run setup.exe. The default destination for the installed program is C:\Program Files\Elecraft_W1. It will create program icons in the Start Menu area only; no icons will be added to your desktop. Also, any DLL programs will remain within the W1's own program directory, not your Windows system folders.
Running:
The default COM port is COM1. This can be changed in the "Com Port" pull-down menu. The program sets up the COM port to 9600 baud, 8 data bits, No Parity, 1 stop bit, No Handshake.
When the program is started it begins to display Forward Power in the upper bar graph and SWR data in the lower bar graph. Click the "Hold" button to pause the program.
In the pause mode you can change the lower bar graph to display either SWR data or Reverse Power. Clicking "Run" resumes the real time update of the bar graph displays.
Other features to try when in the "Hold" mode:
- You can turn the LEDs on the W1 off or on by clicking the button on the lower right corner.
- You can set the Range of the W1 to "Auto" (default), "1.4", "14", or "140". Use the "Range" pull-down menu to access these settings.
- There are a number of W1 options you can adjust in the "Settings" pull-down menu. This allows you to customize the performance of the W1 to suite your personal taste. The settings can be saved in the nonvolatile W1 EEPROM.
- You can see the firmware version of your W1 through the "Help"..."About" pull-down menu.
The VisualBasic version 6.0 source code for this program is also available above. If you enjoy writing programs you may want to download this as well.
Here are a couple of suggestions for new W1 applications you could write:
- Plot the bandwidth of an antenna with the W1 and a pc controlled HF transceiver (such as a K2!).
- Make a "High SWR Warning" screen that is visible across the room from your pc monitor (and drops the transceiver's power if the warning is ignored after a few seconds).
Let us know if you create a "killer app", and we can add it to this page to share with others.
Thank you and have fun!
W1/K2 Control Programs written by Our Very Talented Customers:
AB3AP's Software Control of Elecraft Gear by Mike, AB3AP. Control your K2 and W1 from a PC.
Retired Product Firmware and Software
View
COLLAPSE
K3 Firmware and Utility
View
COLLAPSE
Current K3, K3/0 Mini and K3s Production Firmware
All versions of the K3 Transceivers use the same Production Firmware and Utility for the Operating System. Visit here to access your Firmware and Utility.
Logging, Control and Remote Software for K-Line & KX-Line (incl. Frequency Memory Editor)
View
COLLAPSE
K3/K3S, KX3 and K2 Control & Setup Programs
View
COLLAPSE
| The software provided for download on this page is provided as a free service to our customers and is provided as-is without warranty. They are considered “unsupported, contributed utilities.” That is, maintenance and support for the software apps is not guaranteed and may not be available on all popular operating systems. Elecraft may elect to update them but makes no commitment to do so. All software on this page is free for use by Elecraft operators. |
Logging Programs That Support K3/KX3/K2
View
COLLAPSE
| The software provided for download on this page is provided as a free service to our customers and is provided as-is without warranty. They are considered “unsupported, contributed utilities.” That is, maintenance and support for the software apps is not guaranteed and may not be available on all popular operating systems. Elecraft may elect to update them but makes no commitment to do so. All software on this page is free for use by Elecraft operators. |
|
(Please let us know of other logging programs that have K3 or K2 support.)
|
KPA1500, KPA500, KAT500 Remote Software
View
COLLAPSE
|
The software provided for download on this page is provided as a free service to our customers and is provided as-is without warranty. They are considered “unsupported, contributed utilities.” That is, maintenance and support for the software apps is not guaranteed and may not be available on all popular operating systems. Elecraft may elect to update them but makes no commitment to do so. All software on this page is free for use by Elecraft operators. This software is helpful in using your K3S, K3, KPA1500, KPA500 or KAT500 in a Remote Setup. This includes a RemoteRig or PC based remote. |
KPA1500 Remote Program (v1.34, 7/12/24)*Requires KPA1500 FW 1.64 or newer
Allows for Remote for monitoring and controlling the KPA1500 amplifier. Also can directly connect to the KPA1500 USB, or via IP addr on your local network.
|
KAT500 Remote Program (v1.16)*Requires KAT500 FW 1.41 or newer
Allows for hosting a KAT500 Remote for monitoring and controlling the amplifier. This program has a built in server and client. KAT500-Remote User's Guide (Requires .NET 4.0, Windows XP or newer only) |
KPA500 Remote Program (v1.17)*Requires KPA500 FW 1.33 or newer
Allows for hosting a KPA500 Remote for monitoring and controlling the amplifier. This program has a built in server and client. KPA500-Remote User's Guide |


K2 Remote, K2 Voice Program Downloads and Instructions
View
COLLAPSE
| The software provided for download on this page is provided as a free service to our customers and is provided as-is without warranty. They are considered “unsupported, contributed utilities.” That is, maintenance and support for the software apps is not guaranteed and may not be available on all popular operating systems. Elecraft may elect to update them but makes no commitment to do so. All software on this page is free for use by Elecraft operators. |
|
K2 Remote and K2 Voice Program Downloads and Instructions K2 Voice provides complete K2 voice feedback (frequency, mode etc.) via your PC.
|
K3 Voice
|
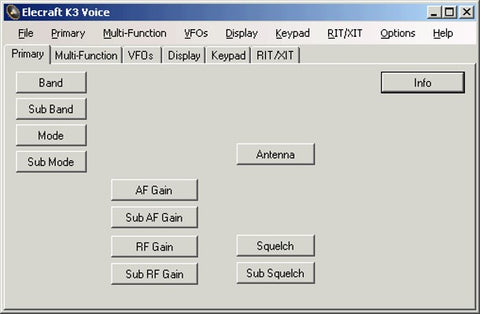
K2 Voice |
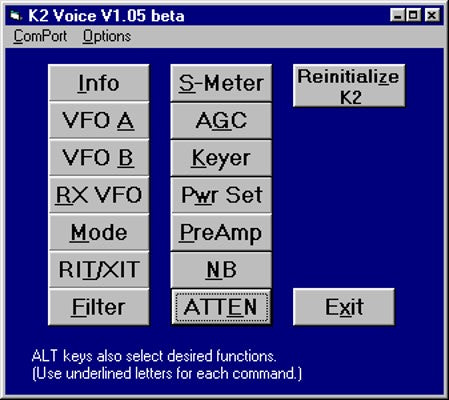
K2 Remote
K2 Remote Main Screen K2 Remote is a basic demonstration RS-232 control program designed for the K2 that runs under Windows (95,98, 2000, XP & ME). It requires the K2 KIO2 RS-232 control option to operate and is provided free without warranty for your use with our KIO2 option. |